Add actors
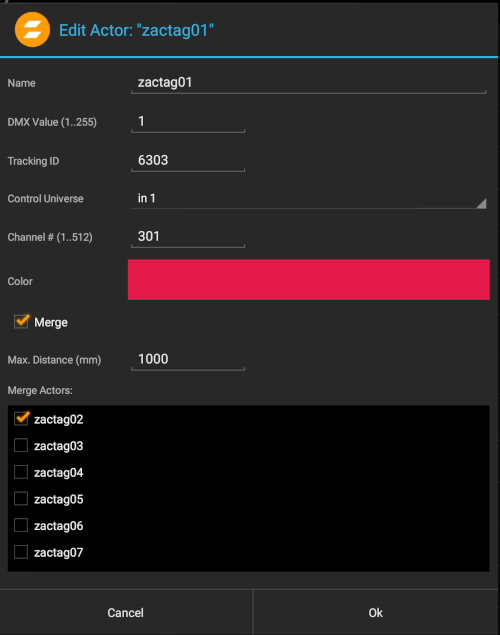
Each zacTag you want to use with zactrack has to be registered in the show editor
- Go to section “Actors” in the Show Editor
- Type in a name of the actor and tap
create
- Type in an unique DMX value
Note: With this identification number you are able to assign this actor to a fixture on the console (For more information go to: Console patching)
- Type in the unique Tracking ID of the tag
- Pick the appropriate input control universe to change target height and speed presets from console
- Pick a color to identify the tag in the live view
- Use “Merge” to use multiple physical zacTags as one
Note: You are able to merge as many zacTags as you want.
Name
Type in the name of the actor
DMX Value (1..255)
DMX Value of which the zacTag will be assigned from the console.
Example: DMX Value 1
Lighting console sends the DMX Value 1 → zacTag is activated and fixture will follow the position of this particular zacTag
Lighting console sends the DMX Value 0 → No zacTags activated → Fixture can be used as a standard fixture without tracking.
Tracking ID
Unique tracking ID of a zacTag. This ID is labeled on the back of each zacTag.
Control Universe
Input universe coming from the console
Channel # (1…512)
DMX start address of the patched zacTag fixture on the console
Color
Pick a random colour which represents the actor in the Live View
Merge
Toggle Merge to use multiple physical zacTags as one because of backup and steadiness reasons
Note: You are able to merge as many zacTags as you want.
