Actors
The Actor view is for adding, editing and removing Actors. An Actor contains one ore more trackers. A tracker is the radio transmitting device on the object.
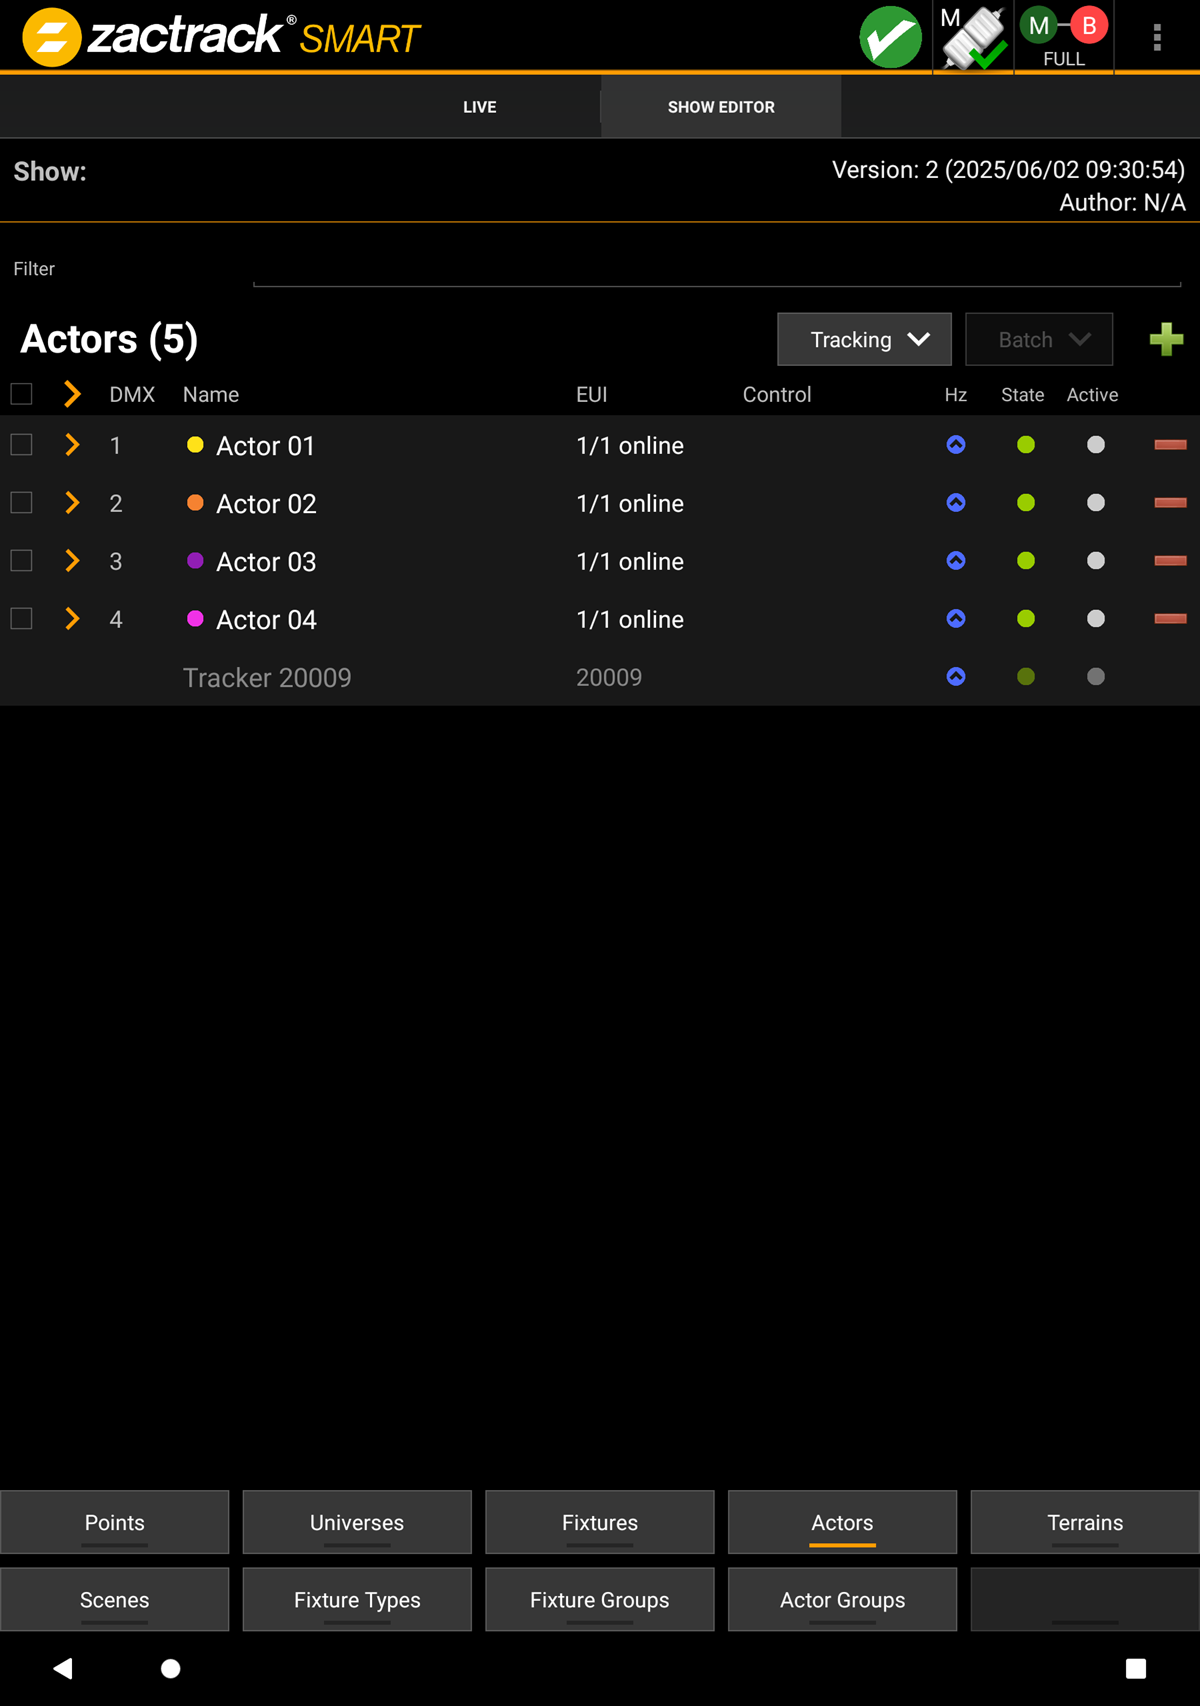 |
All Trackers will be shown as light grey when there are online but not assigned to Actors in the system.
Note
In a PRO system it is necessary to add the Trackers in the Device Settings.
Create Actor from Tracker
An Actor can be created directly from an online Tracker.
Click on the desired light-grey Tracker in the Actor list.
A dialog pops up
Create a single Actor
An Actor can be created independently from the current Tracker set.
Tap the
 button on the top right of the list.
In the dialog, keep the option and provide a name for the Actor.
Tap to create the Actor.
The detail dialog for the new Actor pops up, providing all options to be adjusted.
Tap to store the changes.
Create single or multiple Actors
Multiple Actors can be created independently from the current Tracker set.
Tap the
button on the top right of the list.In the dialog, switch to the creation mode and provide a name prefix, ID (start index) and quantity of new Actors. Control input can also be set.
Tap to create the Actors.
Tap on a newly created Actor in the list to adjust its settings.
Creating Actors from the context menu
Actors can be created from online Trackers by using the context menu.
Long-press on a Tracker to open the context menu.
Select one of the menu items to perform the related action.
The context menu allows multiple actions to be performed.
Auto Add
Adds the Tracker as the next free Actor.
Auto Add To
Adds the Tracker to an existing Actor.
Auto Add All
Creates new Actors for each available Tracker.
Auto Merge All
Adds a single new Actor containing all available Trackers.
Highlight
Flash the LED on the selected Tracker.
To edit an Actor, tap on the row of the Actor.
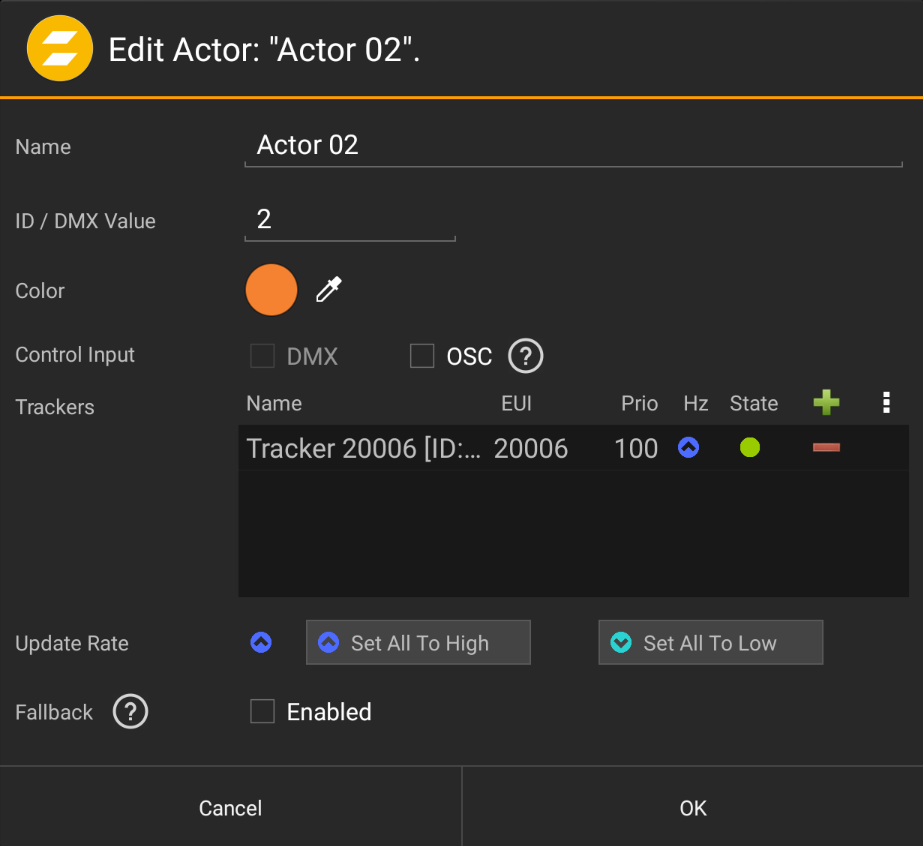 |
Name, ID, Color, Control Input are the basic settings.
The control input allows the complete remote control of the Actor settings via DMX and/or OSC.
Note
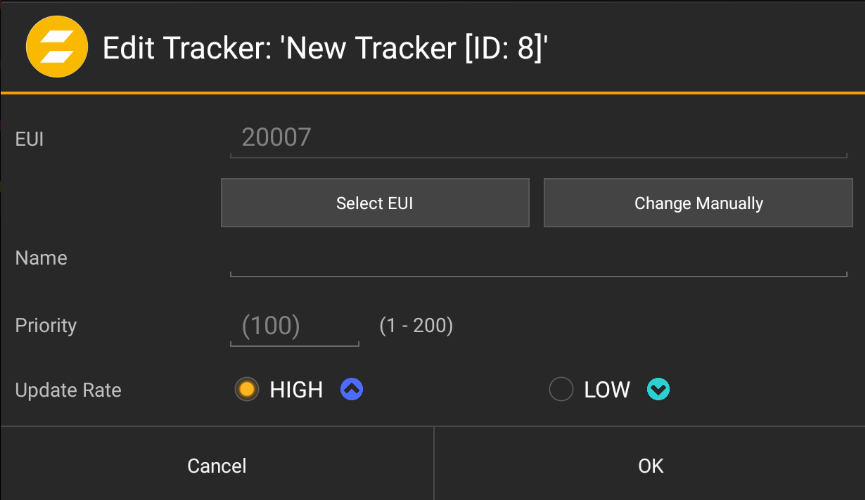
SMART and MINI Systems can choose a HIGH or LOW Update Rate. See Tracker Update Rate for more information.
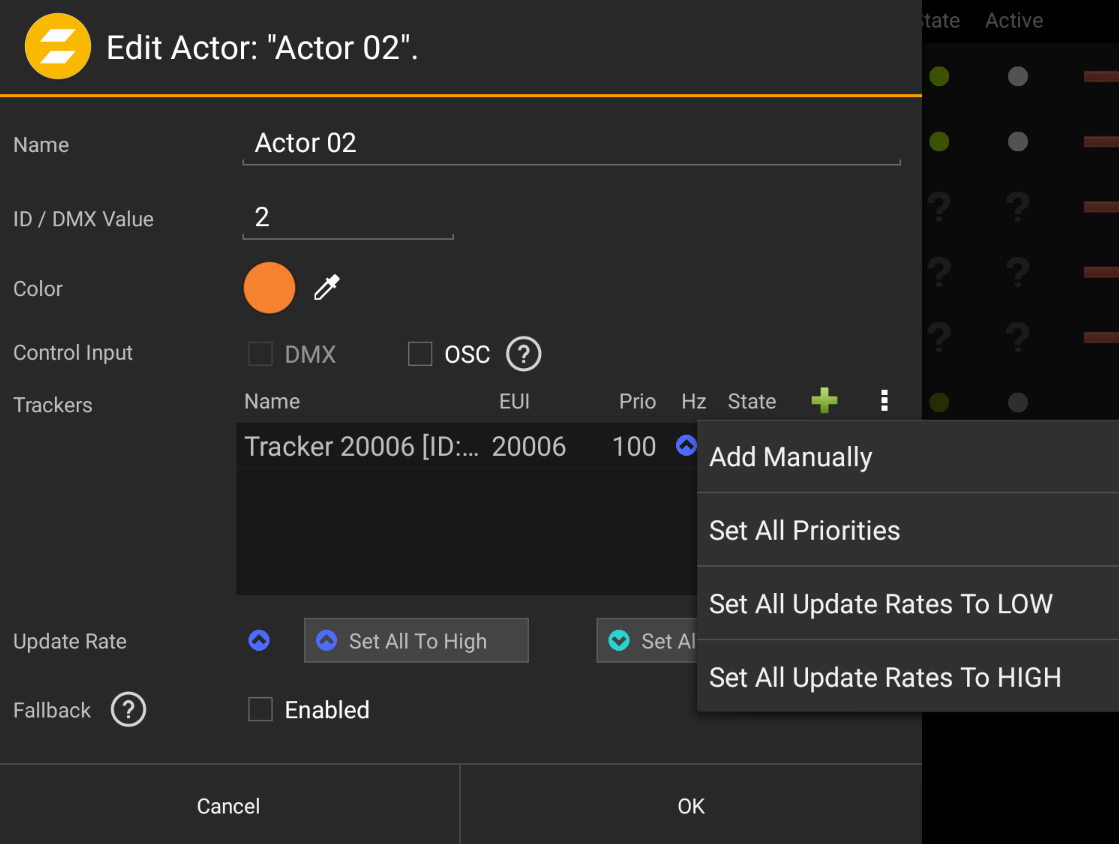
The tracker selection window lists all trackers which are connected to this Actor. It is possible to manually add a tracker with its EUI number by tapping the button on the top right of the list.
 |
Batch Edit
Use the Batch menu to edit multiple Actors at once.
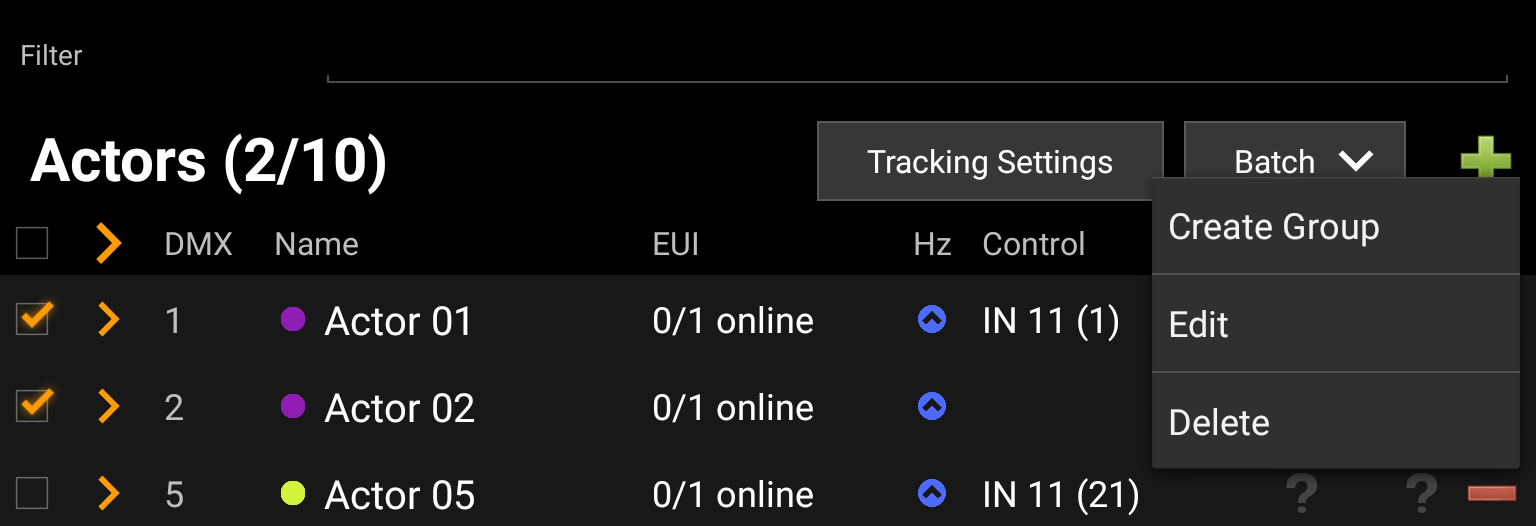 |
Create Group
Create an Actor Group using the selected items.
Edit
Edit details of all selected items at once.
Delete
Delete all selected items at once.
Warning
Tracker Priority is a feature only for SMART Systems.
By clicking a tracker, it is possible to set a priority value. This priority will guarantee to give the tracker more importance than the others.
Example: 10 High Update Trackers and 0 Low Update Trackers are allowed in the tracker settings. At the moment there are 10 trackers, all with priority 100, active in your show. Now the 11th tracker which comes on stage will not have space to get active. With a higher priority (101) this tracker will kick another tracker to get the slot.
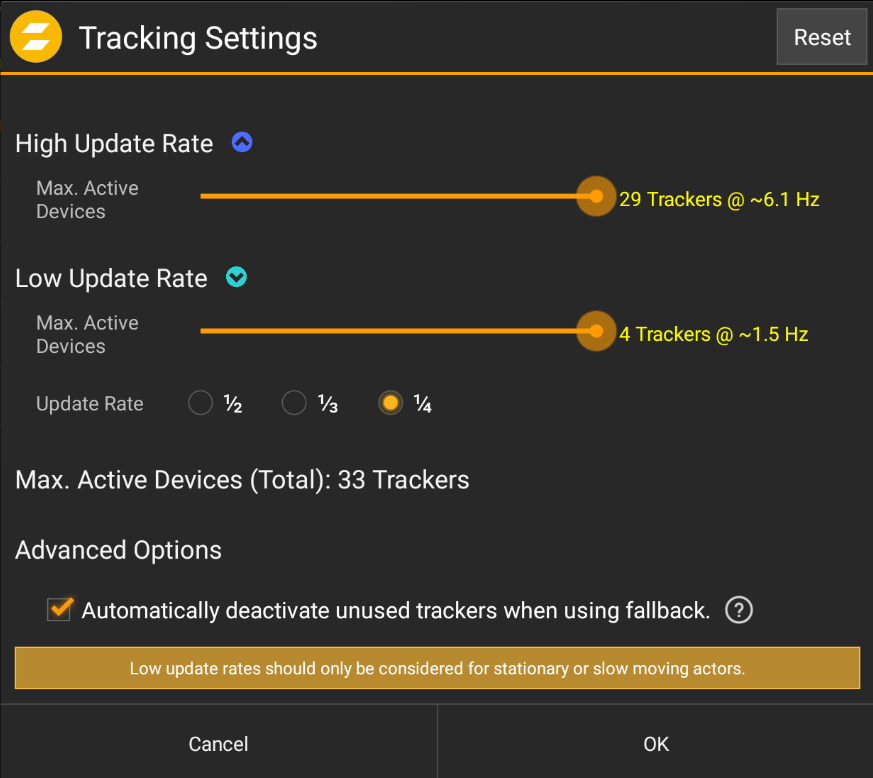
Tap the Tracking button on the top of the Actors List to adjust Tracking related settings.
Tracking Settings
In the Tracking Settings it is possible to set up the necessary tracking slots, divided into High Update and Low Update Rate trackers. See Update Rate for more information. This feature is only available on SMART and MINI systems.
Additionally, unused trackers can be automatically deactivated to keep the number of simultaneously active trackers as low as possible when Actors are configured with fallback. Tap the help icon to get detailed information.
 |
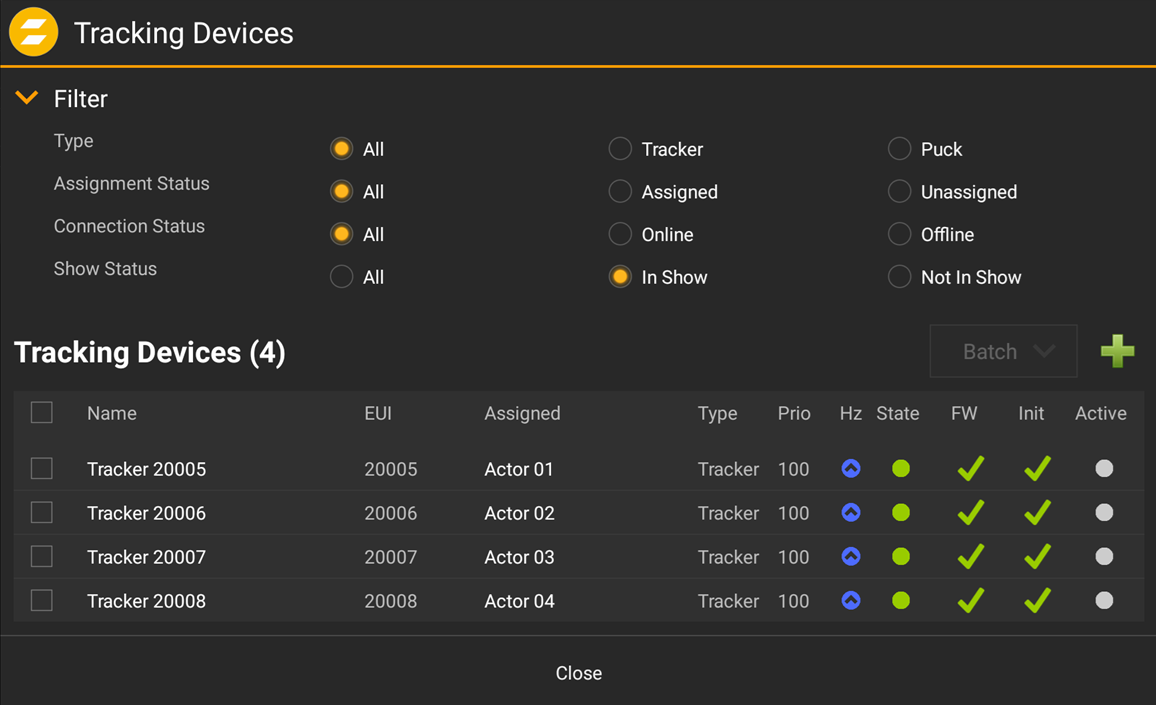
Tracking Devices
This dialog provides an overview of all Tracking Devices (Trackers and Pucks) configured in the system. The list can be filtered in multiple ways.
 |
If an Actor has multiple Trackers defined, the resulting position is a merged (mean) value of all online Trackers. Outliers can be filtered by defining a distance value. E.g. with 3 trackers, if one of them has a distance greater than the threshold to the merged position, it will be filtered out.
 |
The main position source for an Actor are the Trackers. In some cases this source is lost (e.g. when the user forgets to carry the Tracker or in case of hardware issues), so a fallback strategy can be set in place.
One or multiple (merged) Trackers
A fixed XYZ position
The last known XYZ position from the Actor
A Calibration Point
Note
Remote control of this feature requires Actor Control Mode to be set to EXTENDED (10 channels). This can be set in the Show Settings.
Enable the Fallback checkbox to activate the current Actor's fallback feature.
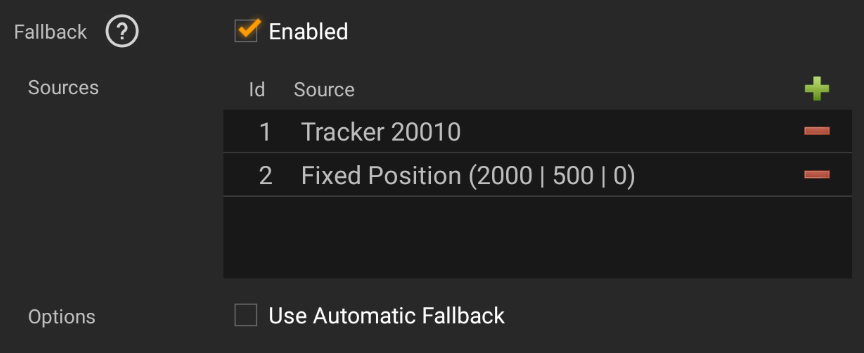 |
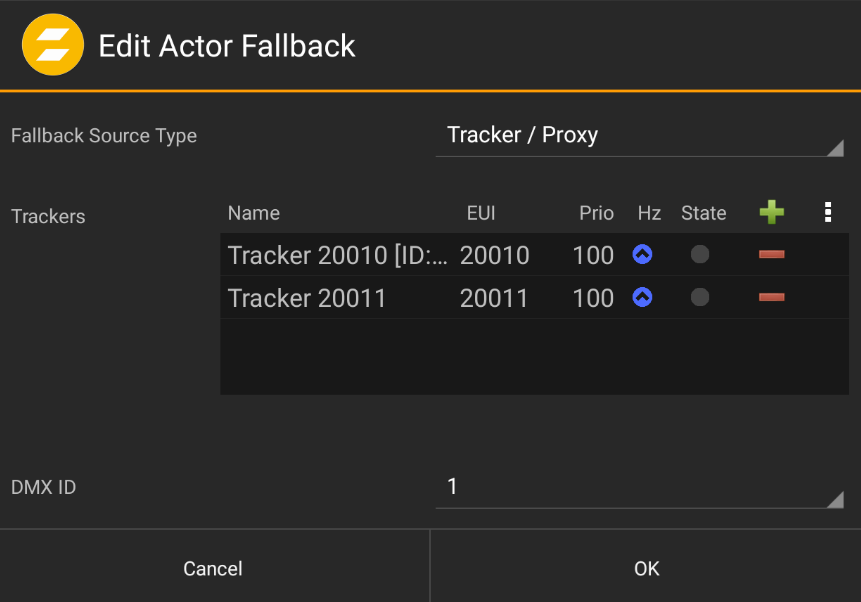
Tapping the button brings up a dialog for defining a new fallback source. Existing sources can be edited by selecting them from the list. There are multiple position sources available to replace the primary position input in that case:
One or multiple (merged) Trackers
Add one or multiple Trackers in a way similar to the Actor's default Tracker list.
Tip
This can also be a Proxy EUI, enabling the possibility for a manual takeover in a Fallback situation.
A fixed XYZ position
Define a XYZ position. The coordinates can be taken from a Disto, a Tracker or defined manually.
The last known XYZ position from the Actor
Assigned Fixtures will point to the Actor's last known XYZ position.
A Calibration Point
Similar to a fixed XYZ position, assigned Fixtures will point to a Calibration Point. Its coordinates can be defined in the Points section.
The DMX ID is used to switch to the related Fallback source via DMX or the App. More information can be found in the Live Actor Settings section in Live Tab.
 |
Automatic Fallback
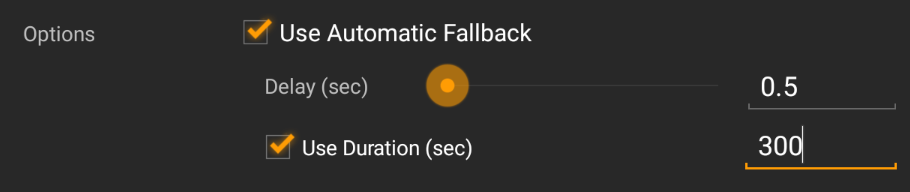
Actors can automatically switch to a Fallback source. This option can be enabled with the checkbox and has the following parameters:
Delay
Time (in seconds) after the Fallback shall be activated in case the primary input goes offline.
Duration (optional)
Time (in seconds) after which an engaged Fallback shall be deactivated and bring the Actor offline.
 |
Note
If automatic Fallback is active, it will only engage after the main position source was online before since the last show update.