Menu
In the top right corner, there are three dots to display the menu.
 |
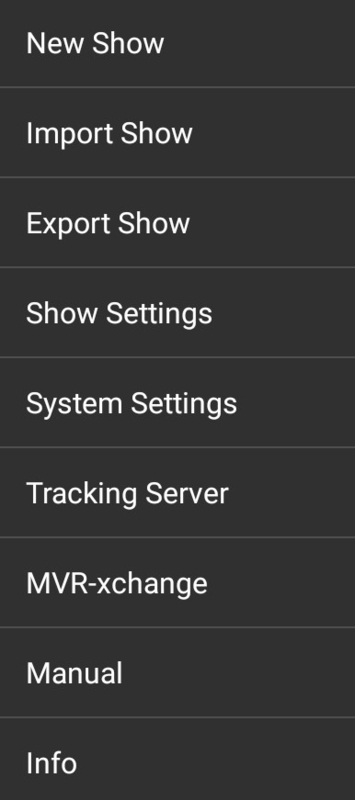
There are various settings in the menu.
 |
Use this button to create a new show.
 |
There are 2 different ways to create a show
Empty Show
completely empty Showfile
Default Show
It is possible to create a Default Show. See Set Default Show
There is a warning message when a new show is created.
 |
It is possible to import a show using the Show Import Wizard.
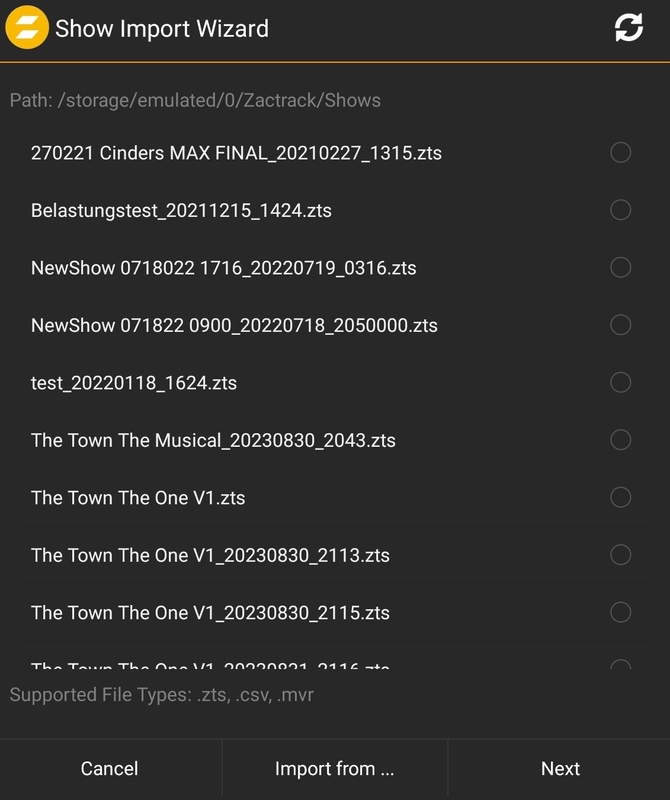 |
The import supports zts, csv and mvr files.
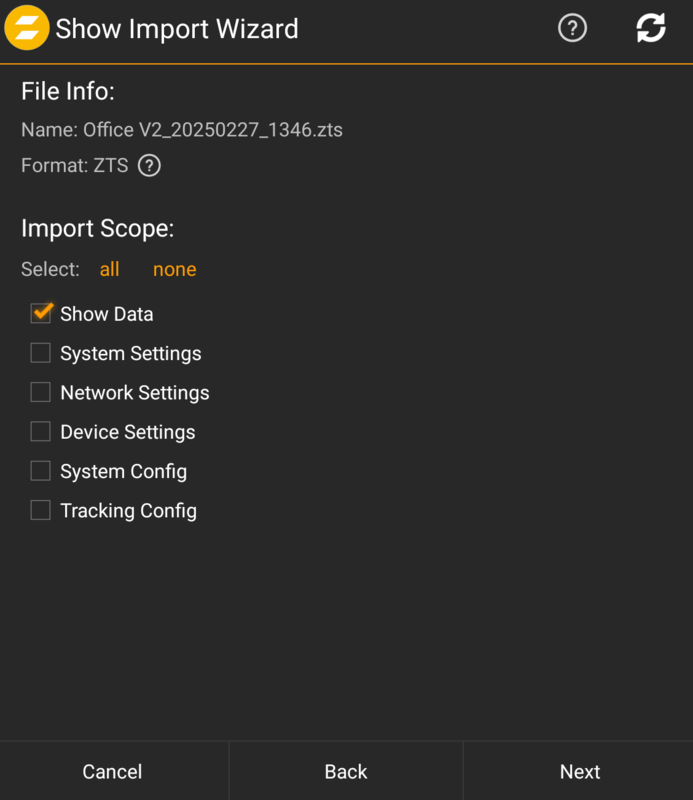 |
You can import show data as well as settings and configs if they are present in the imported dataset.
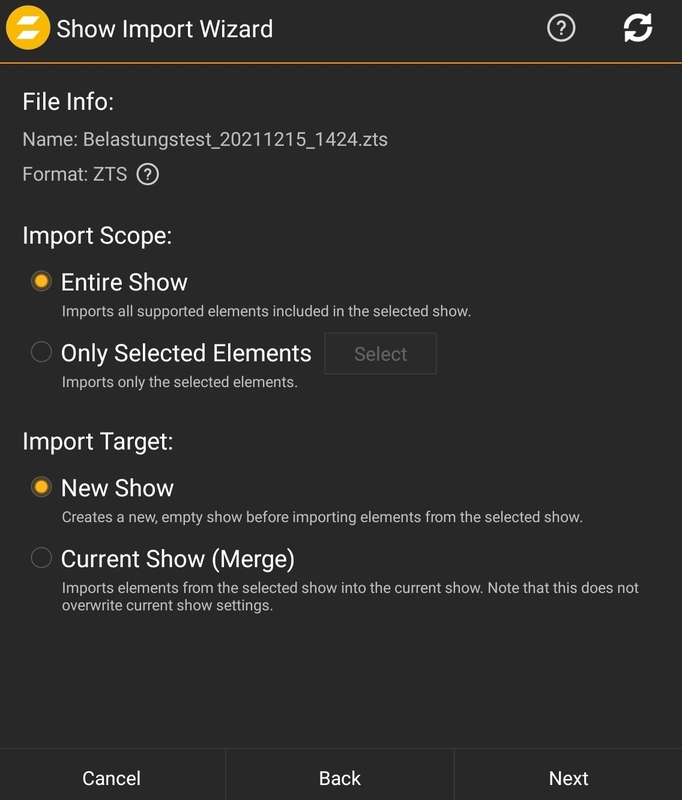 |
After the selection of the show file, a second window containing settings will open up.
Import Scope: Entire Show
Imports the whole show.
Import Scope: Only Selected Elements
Imports certain objects
Import Target: New Show
Create a new show
Import Target: Current Show (Merge)
Merge the new components with the current show.
MVR
The My Virtual Rig (MVR) format is a file format that is used to share data for a scene between a lighting console, a visualizer, a CAD program or similar tools. The zactrack App supports importing of MVR Files.
See MVR for more information.

MVR import provides advanced options, which can be configured when pressing Advanced in the top right corner.
Advanced import options are:
Override Universe Priority (sACN only)
Automatically assign IN Universes to Fixtures
Show files can be exported from the server through the Export Show to File Menu.
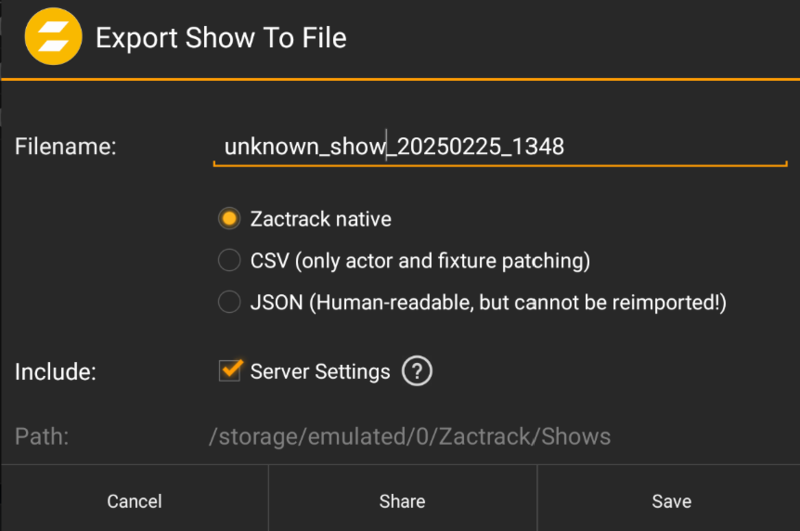 |
Name your show file under Filename
The default name contains the name of the current show as well as the current date and time.
Choose what type of file you want to export: zactrack Native, CSV, or JSON
zactrack Native is a smaller, more efficient binary format that is not human-readable, but can be saved, loaded and transferred between zactrack servers.
Note: Always choose this format if human readability is not important.
CSV is a file that can be edited in a table format and then re-imported into zactrack for patching Fixtures and Actors
Json is a bigger, less efficient, but human-readable format.
Note: Exported show files in this format cannot be re-imported.
Choose if you want to include the server settings in the exported file. These include system settings, network settings, device settings, system config and tracking config. Exporting this data is only possible with the zactrack Native (ZTS) format.
Press Share or Save to finish the exporting process
Click Save to save the file to the default zactrack show directory (/storage/emulated/0/Zactrack/Shows).
Click Share to share the file with any suitable application. By using appropriate software, this can be used to, e.g., store the file in an arbitrary location or upload it directly to Google Drive.
The Show Settings can add a name and an author to the current show.
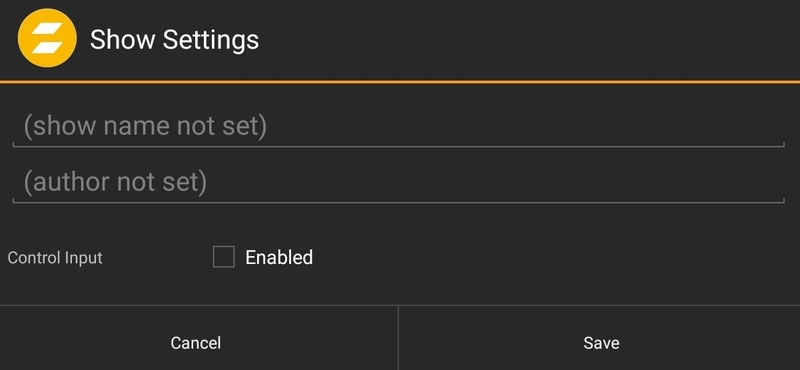 |
To control the scene and the terrain functionallity it is possible to enable the Control Input.
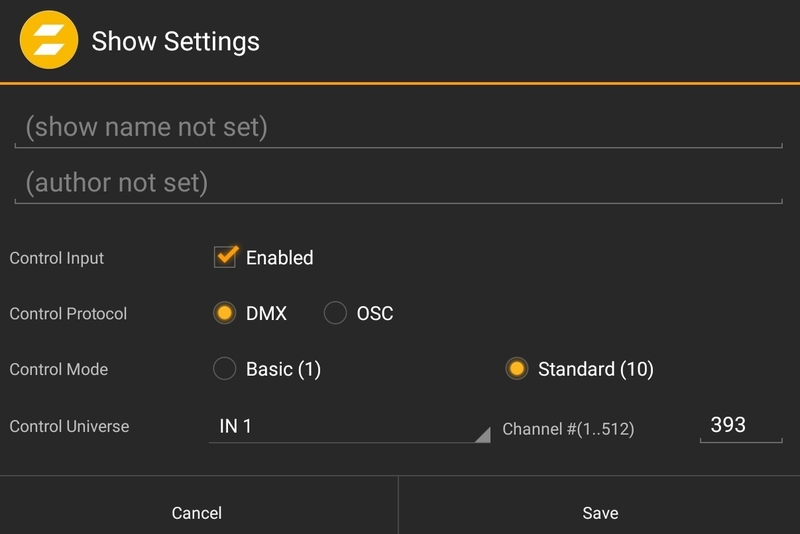 |
The control Input can be either DMX or OSC.
Tip
See OSC Show Control for more information.
When coosing DMX as the control protocol two different control modes are available.
Basic - 1 DMX Channel
Channel 1: Scene Selection
Standard - 10 DMX Channels
Channel 1: Scene Selection (0-255)
Channel 2: Terrain Selection (0-255)
Channel 3 - 10: Reserved for future use
It is possible to select a Universe and channel.
Tip
Add a universe first. See Universes for more information.
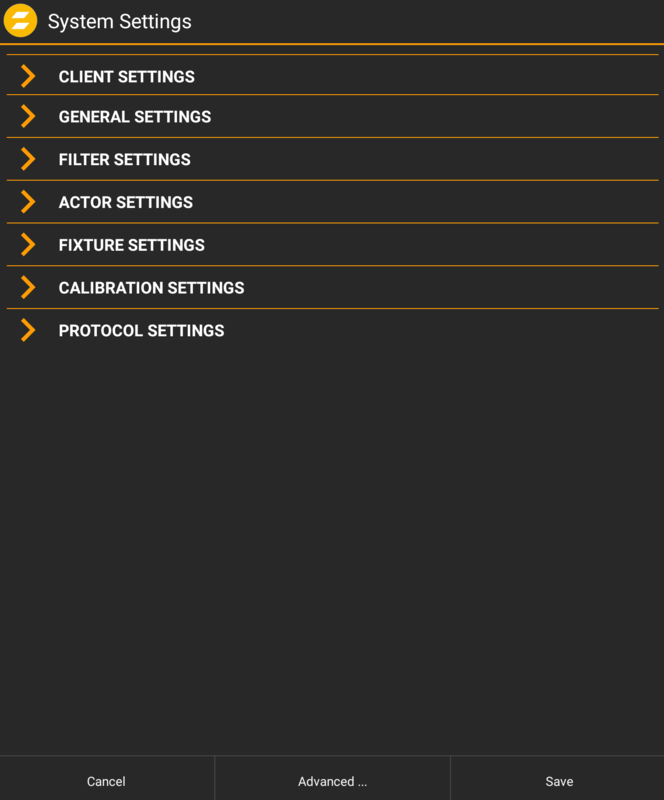
The System Settings Dialog opens. It is grouped by different topics.
Warning
Changing these settings can influence your tracking!
 |
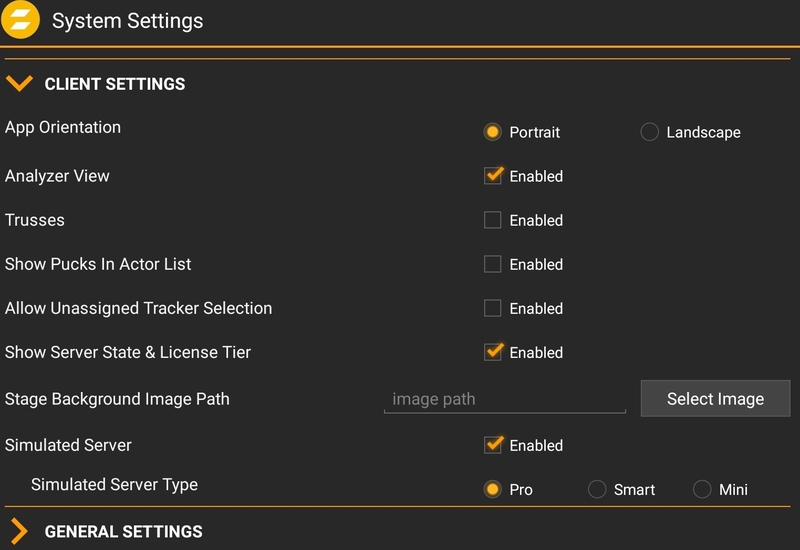 |
App Orientation
It is possible to use the Tablet in different Orientations
Analyzer View
Activate the view for additional analysis data next to the Show Editor
Trusses
Show Trusses as category
Show Pucks in Actor List
In Default the pucks are only for Setup and Alignment. It is also possible to use them as trackers. It is necessary to enable this.
Allow Unassigned Tracker Selection
Select a tracker without included in an Actor
Show Server State & License Tier
Show or Hide the state and license in the Main App View
Stage Backgorund Image Path
It is possible to add a backgorund picture in the live view. E.g. a Layout of the stage
Simulated Server
It is possible to activate a simulated server for educational purposes. The kind of simulated server is selectable.
 |
Tracking Mode
It is possible to limit the complete system to 2D only. Setting the tracking mode to 2D means that the z-position (height) of all actors no longer changes with the actual height of the tracker, but are instead determined by the actor's height setting (see Actors view) and possible XYZ console offsets.
Transmission Power Offset (dB)
Changes the power offset of the system
Zactrack WIFI Puck IP
The old zactrack PRO Puck with Wifi connection.
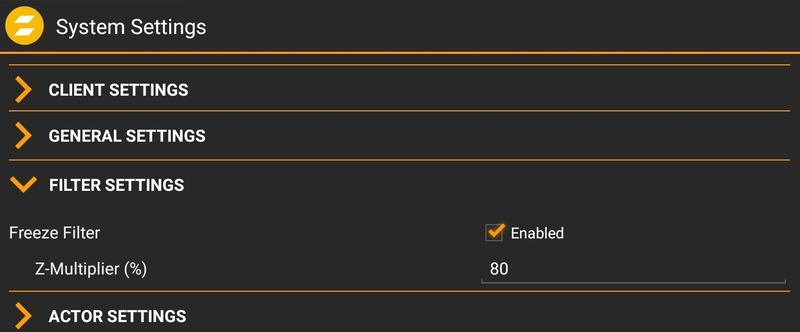 |
Freeze Filter
The Freeze Filter enables a steady fixture beam even during small actor movements. The Freeze Filter can be adjusted for each Actor on a control channel. 0% means no freeze (every little movement is recognized), 100% freezes the actual position. The fixture is still on the point and doesn't follow the Tracker.
Z-Multiplier
The Z-Multiplier shown in percent says how much freeze is used from the actor channel in z-direction. Normally there is a very small amount of movement in z-direction, so a smaller freeze is possible.
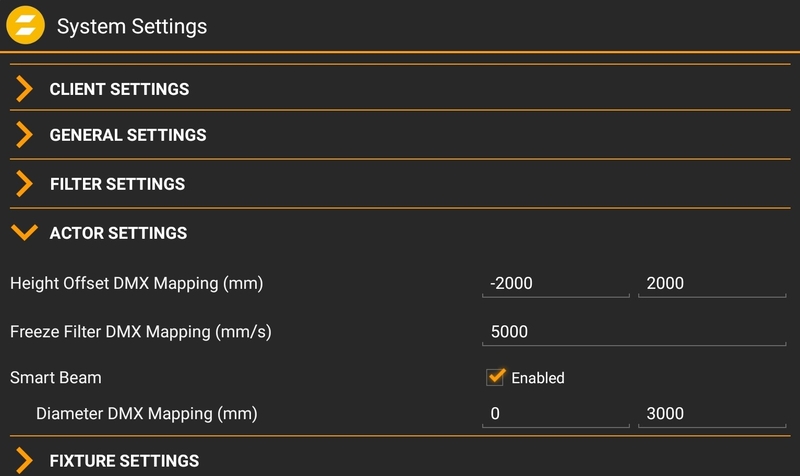 |
Height Offset DMX Mapping
It is possible the set a hight offset on each tracker via the console or in the live view. For instance, if the tracker is mounted on the shoulders, but the middle of the light beam has to be on the chest you can do this with the height offset. With these values it is possible to arrange the DMX range to this height. DMX is an 8 bit value from 0-255, as an example 0 means -2000mm offset and 255 means 2000m offset.
Freeze Filter DMX Mapping
The Freeze Filter is used for removing small movements. The light stands still on the tracked person and small movements with the shoulders don't move the fixture. The strength of it can be arranged in the live view or on the console. The meaning of the value is: 0 no freeze (each movement is transferred to the fixture) and 255 freeze position (the actor can move away and the fixture stays on the freezed point). The intensity of the freeze between 0 and 254 is set with these settings.
Smart Beam
The smart beam allows a constant beam size, if it is physically possible. If the correct values for the zoom, iris and focus area are contained in the fixture type the system automatically calculates the needed values for zoom iris and focus. The value of the DMX Mapping is for controlling the size of the beam via the console.
Diameter DMX Mapping
Smart Beam Mapping (as long as the fixture can do it) in absolute mm.
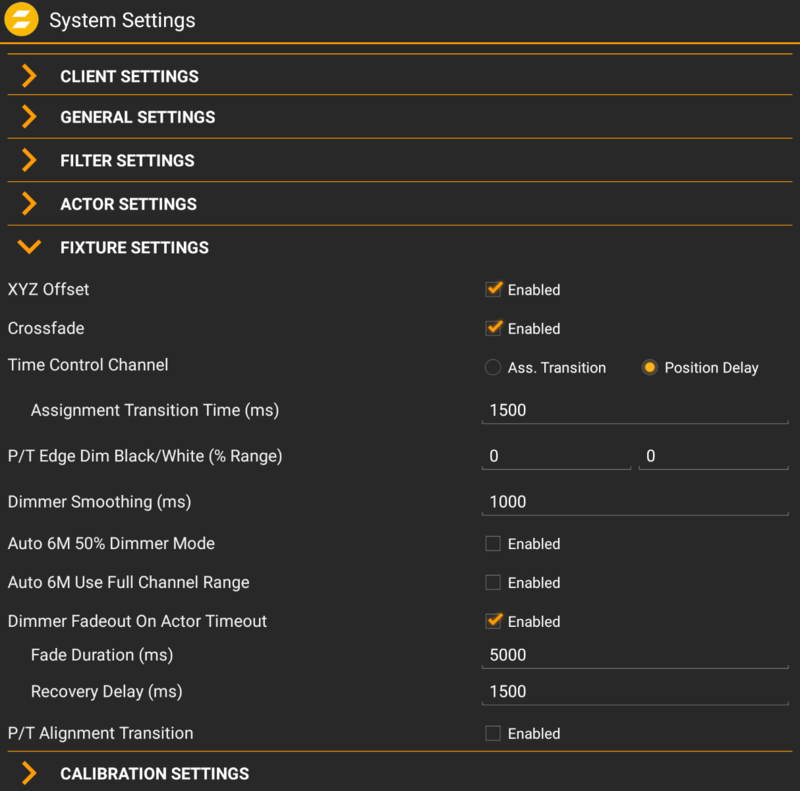 |
XYZ Offset
Enables the XYZ Offset.
Crossfade
Enables the Crossfade
Time Control Channel
The Time Control Channel (DMX 4) can have 2 different functions:
Mode "Assignment Transition" enables variable transition time when a fixture assignment changes, controlled by the channel value. Mode "Position Delay" introduces a position delay defined by the channel value. The fixture will point to a target defined by a certain value in the position history of the assigned Actor. If this mode is active, a fixed assignment transition mode can be defined in the field below.
P/T Edge Dim Black/White
If a fixture reaches its physical PAN or TILT limits while tracking an actor, it might have to perform a flip to continue tracking. By default, the dimmer value will not change during this flip.
By adjusting the values P/T Edge Dim Black/White (% Range), you can define fade out areas on the edge of available pan/tilt ranges. The dimmer value starts to fade out at the first value and is complete off at the second value. In many cases, this leads to the flip being less visible due to it happening in total darkness.
Dimmer Smoothing
The value of the Dimmer Smoothing says how long it takes to dim up the light on the console value, if the tracker activates in the system.
Auto 6M 50% Dimmer Mode
If this option is activated, the dimmer value from the console will merged directly like the other channels (IRIS , Zoom,..)
Old Feature will be removed in Future Version!
Auto 6M Use Full Channel Range
Instead of mapping the real DMX data to output e.g. Iris it uses the full channel range. E.g. IRIS value from 0-131 (DMX) 132-255 Effects etc. will mapped to 0-255.
Old Feature will be removed in Future Version!
Dimmer Fadeout On Actor Timeout
In Auto 6 / Auto 6M it is possible to dim the fixtures off, if the Actor signal is lost.
Fade Duration
Duration of the Fade out in case of Actor Timeout. In milli seconds.
Recovery Delay
Wait time, to get a stable Actor position to fade back in.
P/T Alignment Transition
During the Alignment, the fixture is sent to the Alignment Points. This jump with more fixtures can produce a truss movement. To avoid this enable the Alignment Transition.
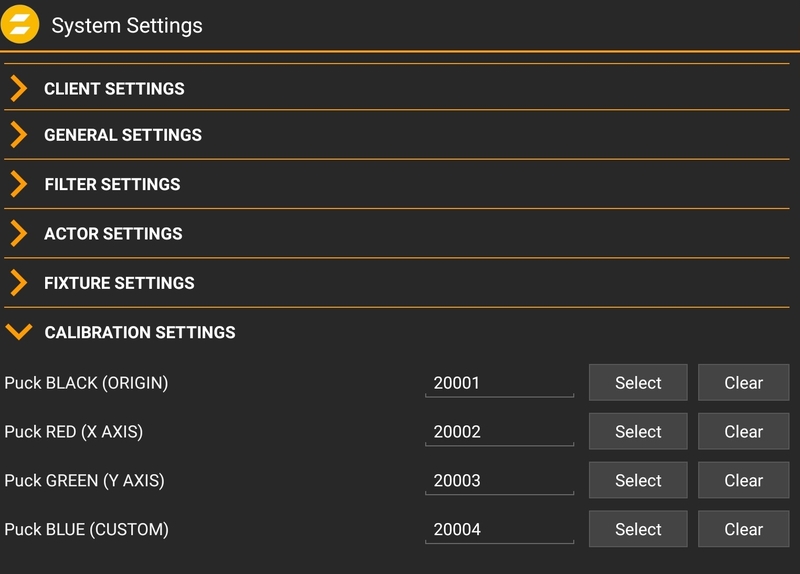 |
Select the Pucks to use the wizards for calibration and alignment.
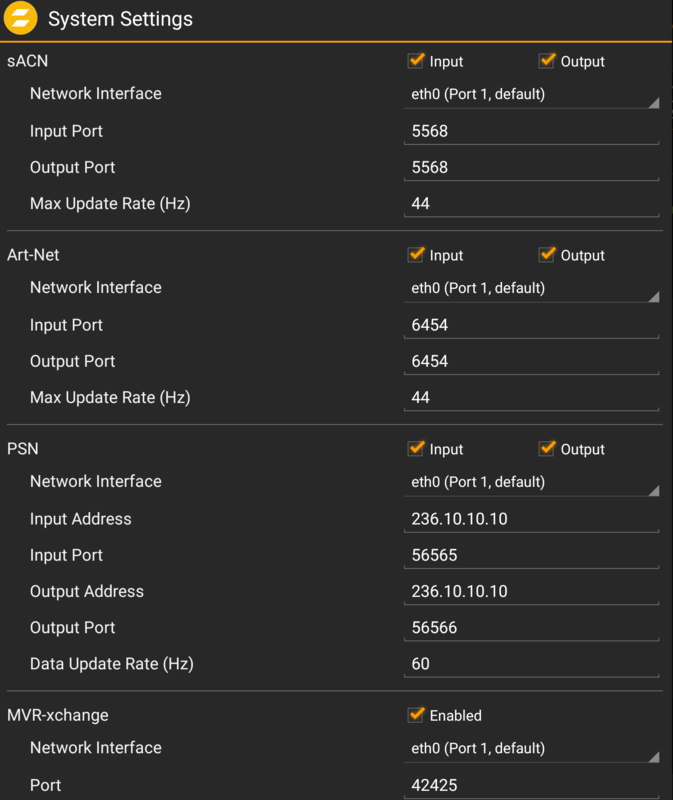
Enable/disable network protocols and define their settings.
Advanced Settings
The Advanced Settings menu is reached through System Settings.
All of these options are only usable if there is an active connection to the zactrack server as indicated by the active server symbol  . When there is no active connection to a server the configurations may appear empty and cannot be changed.
Warning
Changing Advanced Settings can lead to significant changes in the system's tracking behavior and may even disable tracking functionality entirely. Only make changes if you know exactly what you are doing
Checking this checkbox activates a mode that allows to maintain your system remotely. Note: Only activate this if you really need to!
 |
 |
You will be prompted with a popup to confirm the Remote Maintence request.
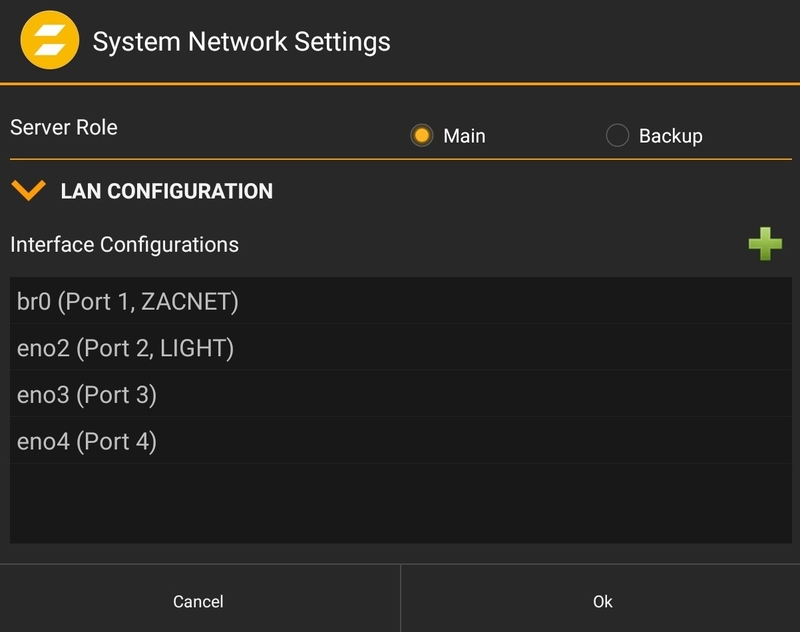
This menu is where the IP addresses can be set for your zactrack server's Ethernet ports. You can also adjust WiFi settings here for your zactrack MINI Server. For more on this go to the page WiFi - Mini Server. The Wireless Settings can be found in the Network Settings menu.
Tip
Depending on the used System the Network Settings may look different.
Settings for a PRO System.
 |
Note
Also the Server Role setting is done here.
Settings for a MINI System.
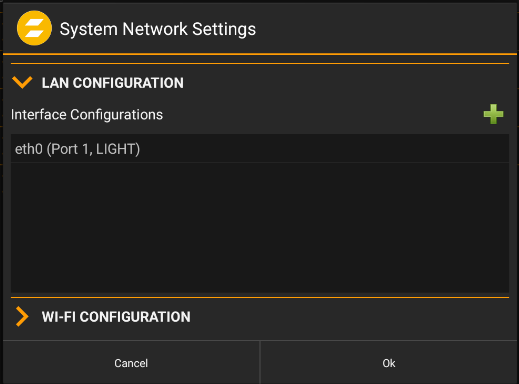 |
The Interface Configurations for the zactrack server can be found under the LAN Configuration drop down menu. This number will change depending if you are using PRO, SMART or MINI. See Interfaces and IP for info on which port is which on your server.
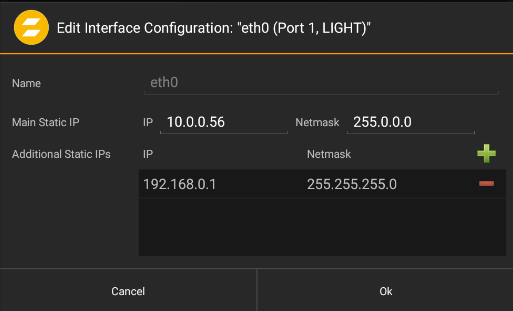
To change the settings on any Ethernet port click it on the screen to get to the Edit Interface Configuration menu.
 |
Setting Name | Definition |
|---|---|
Name | Will change the name of the port from the default to a custom name. |
Main Static IP | Every port must have at least 1 IP address. This is the Main Static IP. Here you set the IP and Netmask for it. |
Additional Static IPs | Ethernet ports can be assigned multiple IP addresses. This is done through the Additional Static IP option. Press the green plus button to add additional IPs with their Netmask. |
Note
Trackers are referred to as Sensors in this menu.
Even if anchors and trackers are not yet patched into a show file, they can be assigned to an ID in advance. This way, when they come online, they will already know their designated ID. This is done through the Device Settings menu.
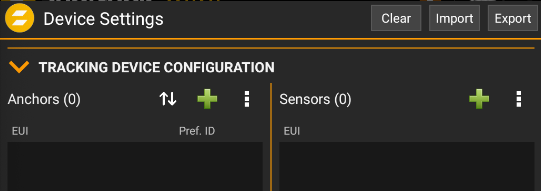 |
Anchors are added by pressing the
 on the right hand side of the window
Fill in the EUI with the EUI number on your Anchor hardware
Add a Preferred Anchor ID.
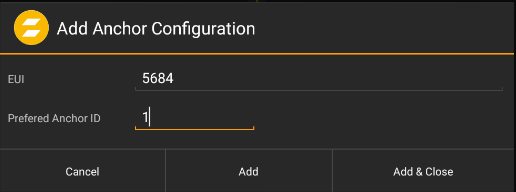
Continue adding Anchors until you have all the ones you need in your show file.
Tip
You can press Add to keep this window open and add more Trackers. Or press Add & Close to return back to the Device Settings.
When you are finished adding Anchors press Save
Now when you add anchors in your Points menu the EUIs will correspond with the Anchor ID you gave it in Device Settings.
Trackers or Sensors are added by pressing the
on the right hand side of the window.Fill in the EUI with the EUI number on your tracker's hardware.
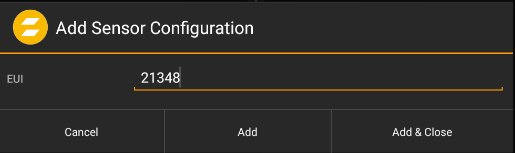
Continue adding Trackers until you have all the ones you need in your show file.
When you are finished adding Trackers press Save.
It is possible to use a In use flag .
 |
Tip
The checkbox in use can be used for large Pro Systems to hold all availbale Hardware in the systems. Example for Renting a system.
Warning
Only use the amount of Anchors and sensors needed for the show. Large entries with everthing in use can affect the tracking server.
Pressing  lets you define the current show as the default show in the future.
 |
You will be prompted with a popup to confirm saving the default show.
 |
The  is for manually changing the configuration file within zactrack with config lines. By adding, deleting, or changing the lines you can change various advanced system settings.
After changing this file, the zactrack server application will restart automatically.
The syntax for each line is: property.name=value
Note
The lines have to match the syntax for the setting exactly.
Make sure that there are no spaces or '#' symbols anywhere.
Double check for typos.
You will find the configuration lines in other parts of the manual where the settings are pertinent.
Pressing  will display system logs of the current session. This can be used to monitor system behavior and/or debug potential problems.
This menu can also be filtered with the radio dial buttons at the top to show: All, Trace, Debug, Info, Warn, or Error
 |
Pressing  will open up the System Report popup.
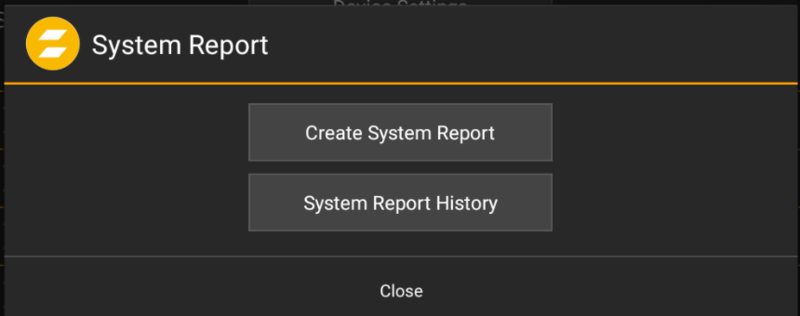 |
This popup has two options. Create System Report and System Report History.
A System Report will create various log files that can be sent to support or a developer for help in diagnosing issues with your zactrack system.
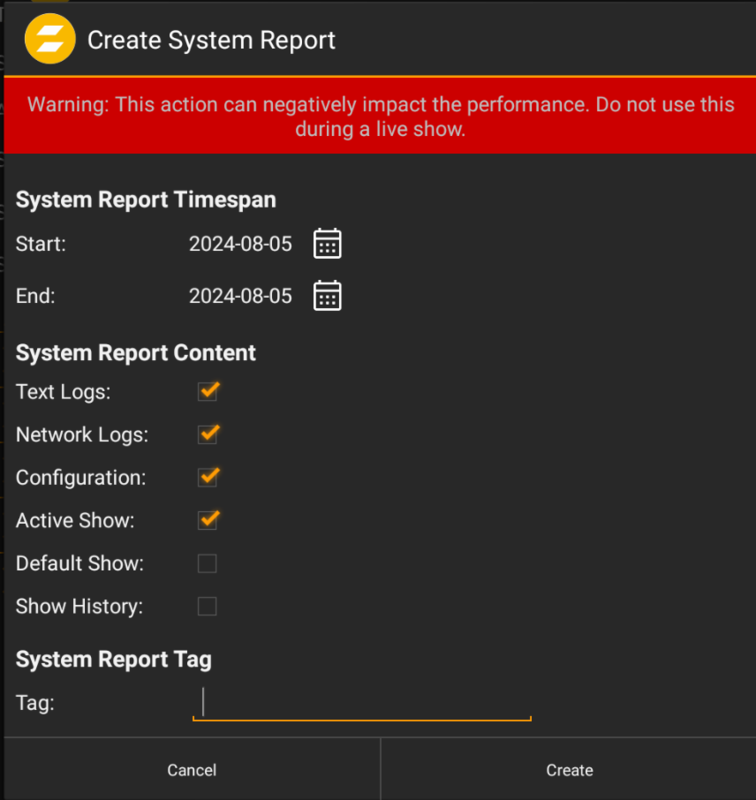 |
System Report Time-span | |
Start | determines the starting point the logs will be pulled from |
End | determines the ending point the logs will be pulled from |
System Report Content | Select the Content for the report |
Text Logs |
|
Network Logs |
|
Configuration |
|
Active Show |
|
Default Show |
|
Show History |
|
System Report Tag | |
Tag | Its possible to choose a Tracker |
Once the configuration for the report has been set, press Create.
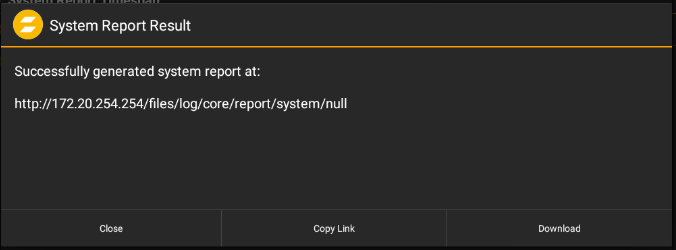 |
To get the file either copy the Link and open it in a web browser or download it directly to your device.
Pressing  will manually restart the zactrack server application.
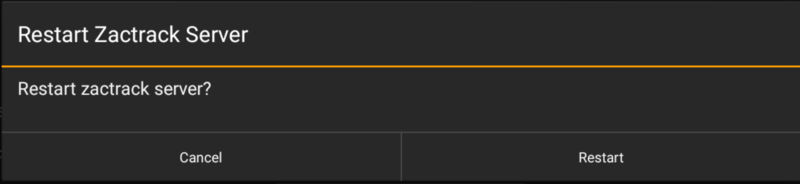 |
You will be prompted with a popup to confirm the restart request.
Pressing  will manually restart the tracking server application within zactrack. This is responsible for all communication between anchors and trackers. All tracking will pause during this process. It should take less than 2 minutes.
 |
You will be prompted with a popup to confirm the restart request.
Note
This only restarts the application and does not reboot the hardware.
Pressing  will open the Factory Reset Menu.
Go to Advanced Settings
Press Factory Reset
Check which parts of the server need to be reset.
Press Ok
Press Reset and Restart
The server will restart on its own when the reset is complete
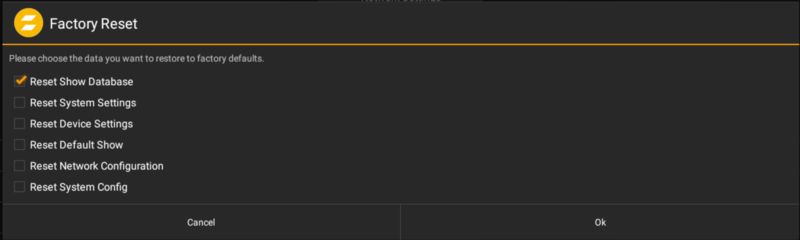 |
Reset Show Data | checking this will clear out all of the show data on your server. This includes: points, actors, fixtures etc. Everything in the Show Editor. |
Reset System Settings | clears out all of the System Settings and sets them back to their defaults |
Reset Device Settings | clears out all of the Device Settings |
Reset Default Show | sets the Default Show back to the default show settings |
Reset Network Configuration | clears out the Network Settings |
Reset System Config | clears out the System Config |
 |
System Configuration Lines
Warning
Changing any settings in this menu can lead to significant changes in the system's tracking behavior and could even disable tracking functionality entirely.
Note
The System Config is only available when there is an active connection to the zactrack server as indicated by the  symbol in the upper right corner.
The System Config is used for changing configurations within the zactrack server. This is done by changing, adding, and deleting lines from this menu.
Note
The lines have to match the given syntax exactly. There cannot be any spaces or symbols anywhere.
The Tracking Server window gives deeper information. Depending on the used zactrack product, this window may look a bit different.
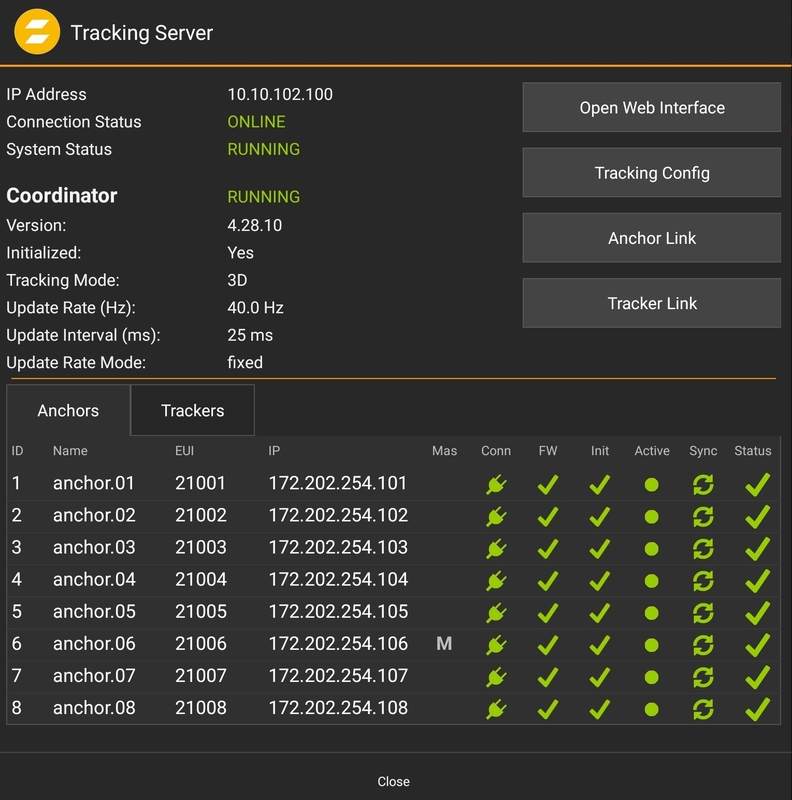 |
General Information
Status and information of the Tracking Server
Available Anchors
Available Trackers
Open Web Interface
For the PRO System there is a separate Web Interface which goes to the Kinexon Web Page in an external browser.
Tracking Config
The Tracking Config is for manually changing the configuration file within zactrack using config lines. By adding, deleting, or changing the lines you can change various advanced tracking settings.
Tip
Be careful there is also a System config.
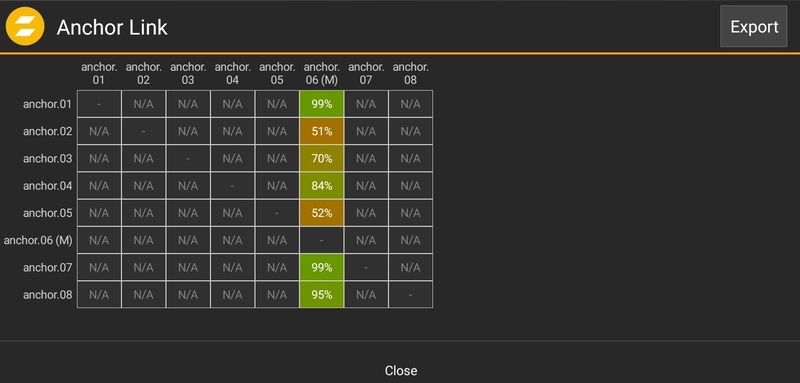
Anchor Link
The Anchor Link is a diagnostic tool to get an idea of the data connection of the system. In a SMART and MINI System only a connection to the Master is shown. In case of a PRO System the full Matrix is shown. The values should be green.
Warning
A bad Anchor Link can cause the system to not be able to calibrate itself. Try to change Anchor position.
Tip
A completely bad Anchor Link could be an indicator for another radio System using the same frequency. It is necessary to have proper frequency management.
Tracker Link
The Tracker Link is also a diagnostic tool to see the amount and quality of every single connection to the Anchors. The Position of the tracker on the human body is really important to get good values.

Tip
If the whole Link is red, it is also possible that an external disturbance source is transmitting at the same frequency.
Tracking Configuration Lines
Sometimes it is necessary to add special settings to your tracking server. A zactrack technician can help.
Note
MVR-xchange since version 3.23.2.0
With the implemented MVR (My Virtual Rig) xchange, it is possible to share Fixture Types as GDTF and the complete Patch from the console to the zactrack System. If a correctly assigned zactrack fixture as a subfixture or Child is used in the patch, the system will automatically patch the current zactrack Fixtures to the Fixtures.
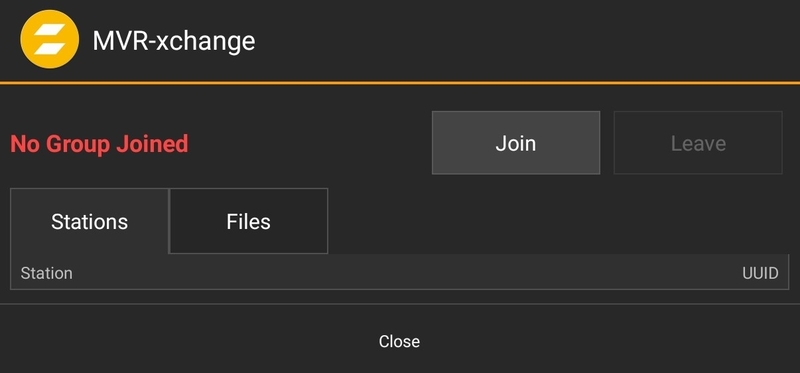 |
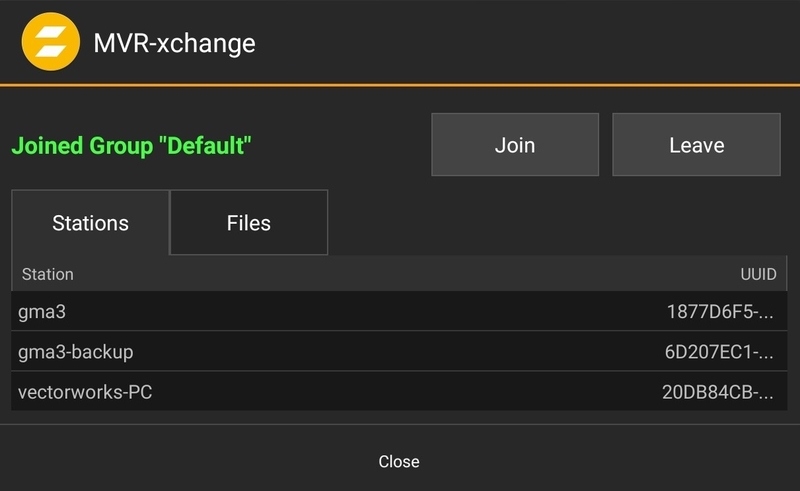
First join an MVR-xchange Group.
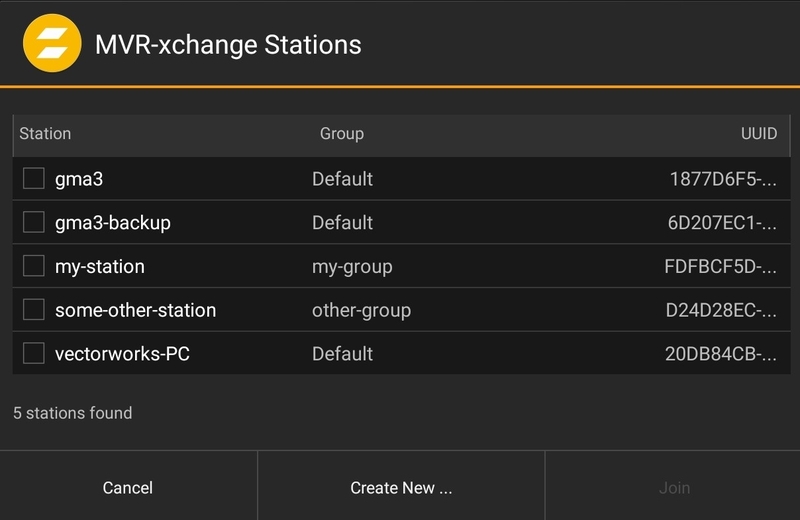 |
Use a Station
 |
In files, there is a shared database.
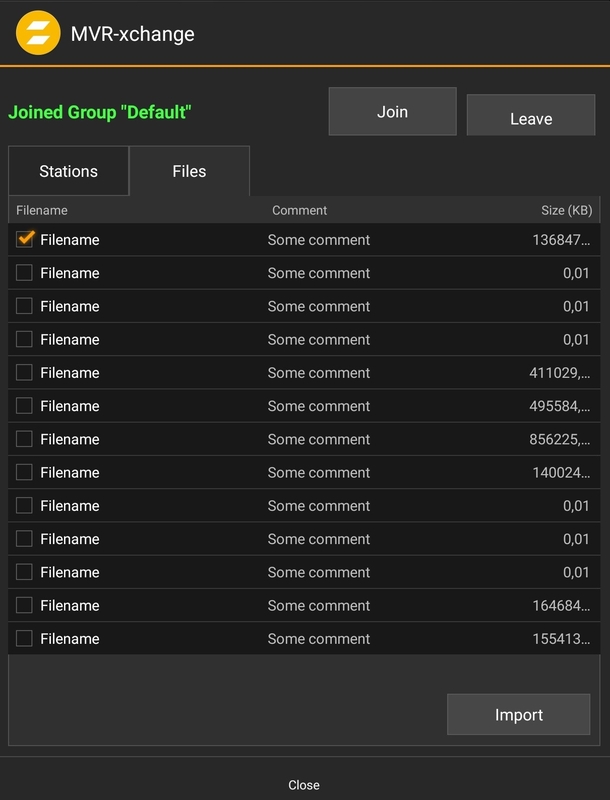 |
Import the Fixtures.
Warning
The MVR File doesn't contain any output station data. Please check the output universes and the used protocols.
It is possible to access the Manual directly out of the Software.
Warning
The manual on the zactrack Server is an offline version! For the latest updates visit manual.zactrack.com.
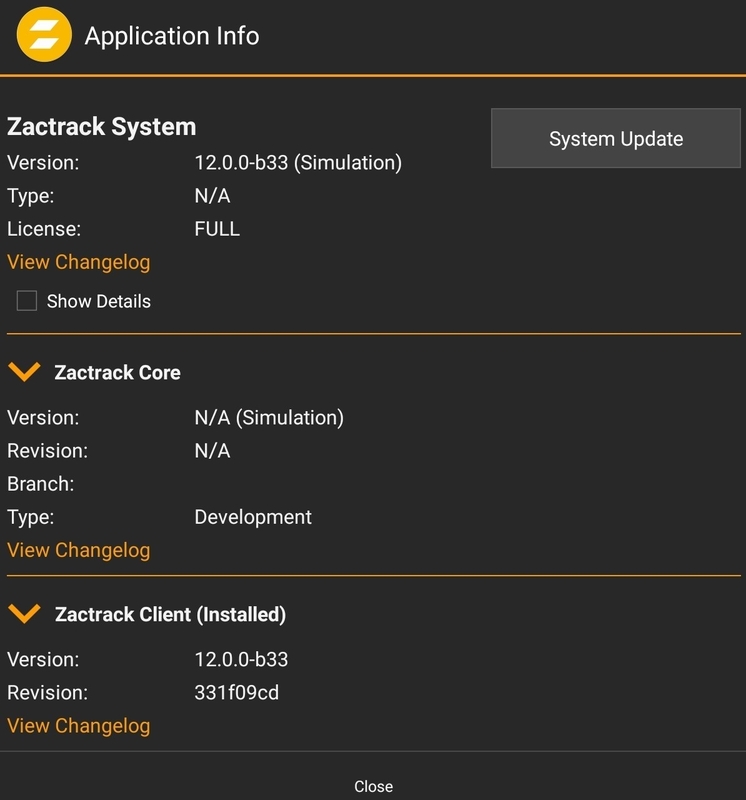
The information shows the currently running software version. It is also possible to view changelogs and you can perform a System Update. See Software Update for more information.
 |