Mount
Mounting the system in the venue or environment is a big step in the process. It includes: placing the anchors, running cable, and connecting to the network. This step can be the most time consuming process, depending on how complex the venue is.
Mount the anchors around the stage according to your 3D or 2D needs
Connect the zactrack server to the zacNET network switch. See Hardware for more information about physical port connections.
Connect the anchors (PRO / SMART) with CAT5e or higher cables to PoE switches within the zacNET
Note
LED on anchor illuminates blue → anchor has power and is actively connected to the tracking server
For more information see LED Pattern.
Caution
Max. cable length for PoE is 100m. It is possible to extend the range with fiber optic cables. See Network Design for more information.
All anchors should be mounted around the stage on different heights. To get accurate Z-axes positions it is necessary to mount the anchors on multiple Z-levels. Below you will find 2 examples for a 3D anchor setup.
For a 3D position the system picks at least 4 anchors.
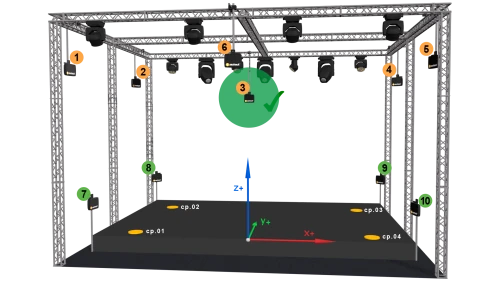 |
3D anchor setup of high and low anchors
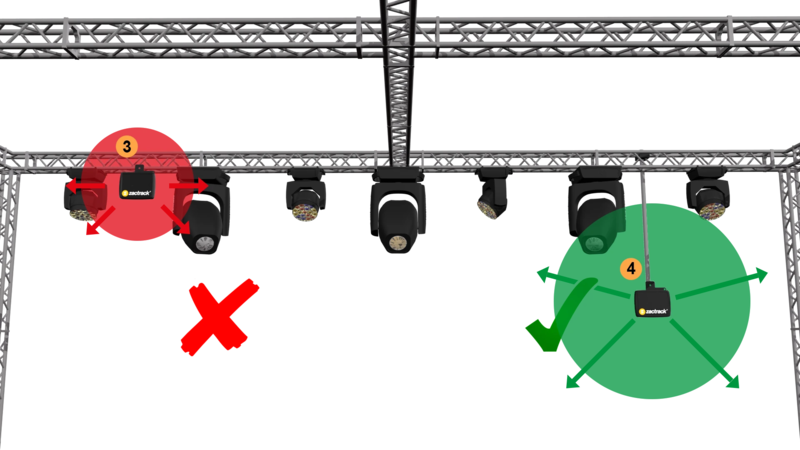 |
Leave enough space around the anchors to reduce permanent reflections!
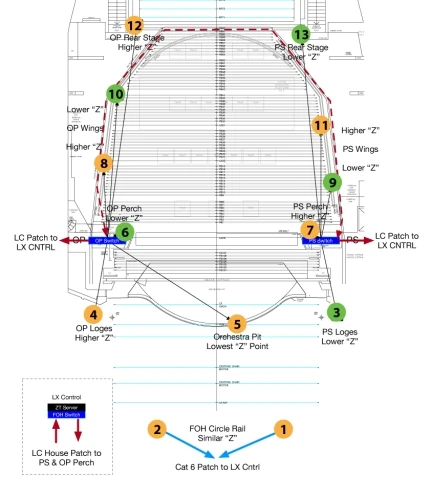 |
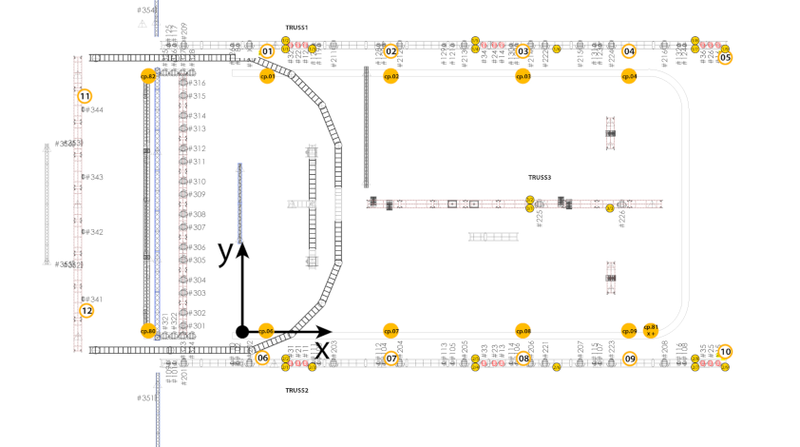
Example of a 3D anchor setup
Note
Don't forget to set the tracking type to 3D in the System Settings.
All anchors should be mounted around the stage. For 2D anchor setups it is NOT necessary to mount the anchors on multiple Z-levels. Below you will find 2 examples for a 2D anchor setup.
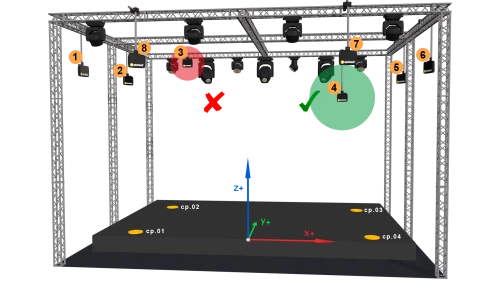 |
2D anchor setup of all anchors on similar heights
|
Leave enough space around the anchors to reduce permanent reflections!
 |
Example of a 2D anchor setup