Live Tab
In this view it is possible to monitor the whole zactrack system or do live settings instead of a lighting or audio desk.
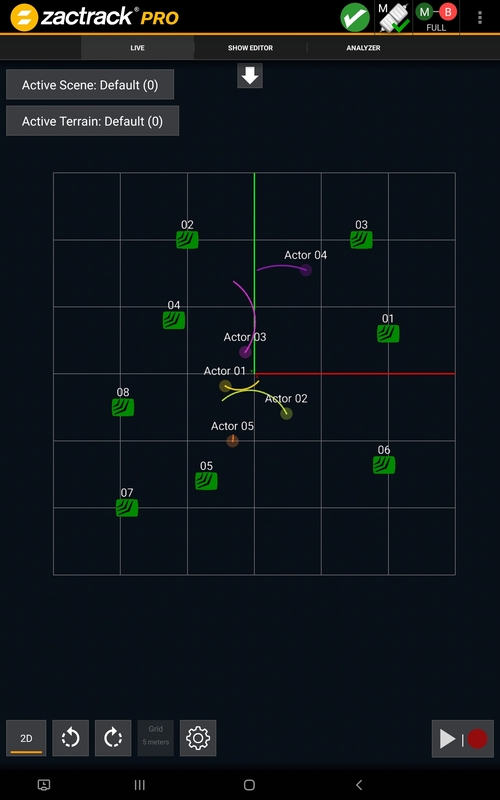 |
2D / 3D view

Change between 2D and 3D
Rotate Left

Rotate the view 90° to the left
Rotate Right

Rotate the view 90° to the right
Grid size
Shows the actual grid size in m
Go to the Settings
Record / Playback
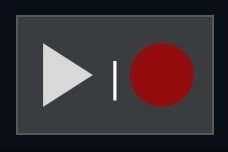
It is possible to record and playback the Actor movements.
Active Scene
Change the current scene manually. You can also find the checkbox for the console control.
Active Terrain
Change the current terrain manually. You can also find the checkbox for the console control.

Tip
Expand the live view with the arrow in the middle of the screen.
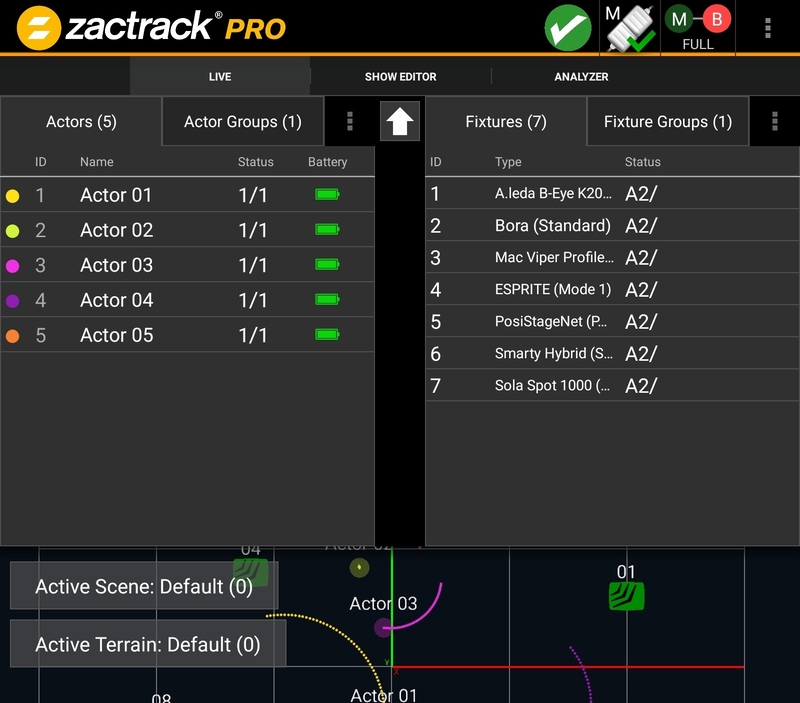 |
On the left column Actors and Actor Groups can be found. On the right side there are Fixtures and Fixture Groups.
Tip
Status information is available here. Battery level active (Inactive Trackers, assigned Fixtures)
Note
To access live setting, just tap an Actor or a Fixture.
To Set all values back to console control press  the 3 dots next to Actor Groups or Fixture Groups.
All changes will affect the current tracking!
Tip
Remove the console checkbox to manually change the settings.
Note
An Actor can be one ore more trackers!
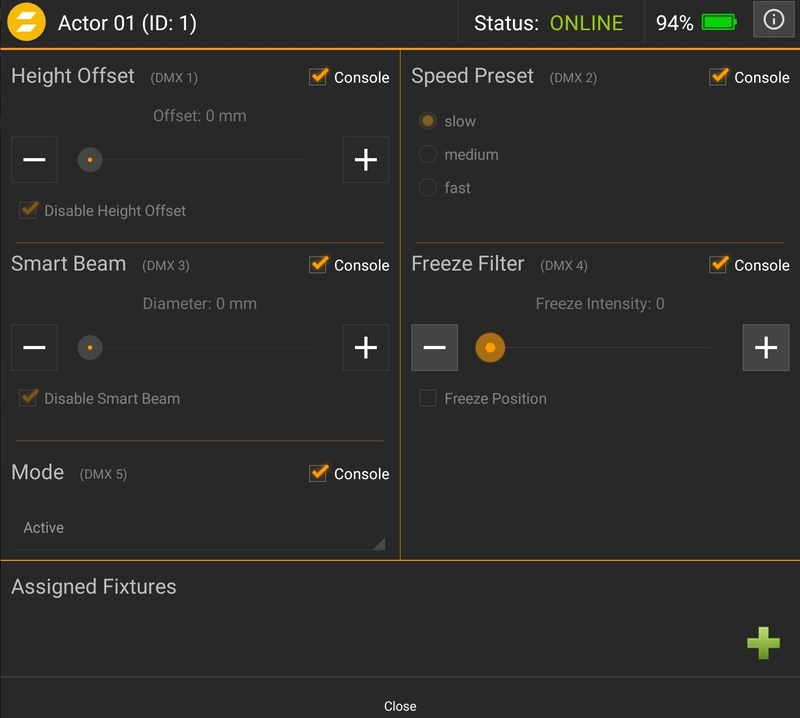 |
Height Offset
The center of the light should sometimes not be the height of the Tracker. E.g. The Tracker is on the shoulder and light should hit the chest. In 3D it is offsetting only the z Height.
In 2D the offset sets the z height.
Smart Beam
zactrack can control the iris and zoom to hold the beam size constant, as long as the fixture is not physically limited
This Feature requires the Auto 6 Mode.
Beam size is shown in absolute Meters.
Mode
Active
Normal 3D operation
Force 2D
Only 2D operation
Dimmer Off
In case of a broken or lost tracker, the Dimmer will not open.
Inactive
Deactivate Actor and release a slot for another tracker
Speed Preset
Every fixture type has three different filter presets that result in different fixture behavior. Adjust this setting to specify the active speed preset of fixtures that are assigned to this actor.
Freeze Filter
The freeze filter is filtering small movements so the light beam is more stable and doesn't follow every little movement.
Next to the battery symbol there is an information symbol.
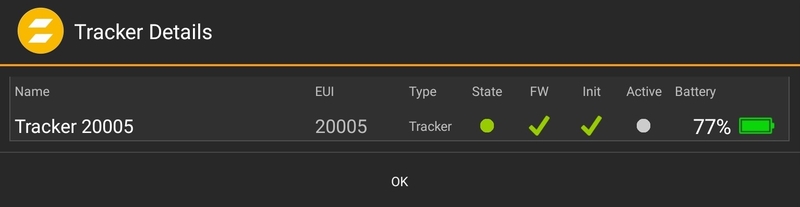 |
Some detailed information about each single Tracker can be found here.
All changes will affect the current tracking!
Tip
Remove the console checkbox to manually change the settings.
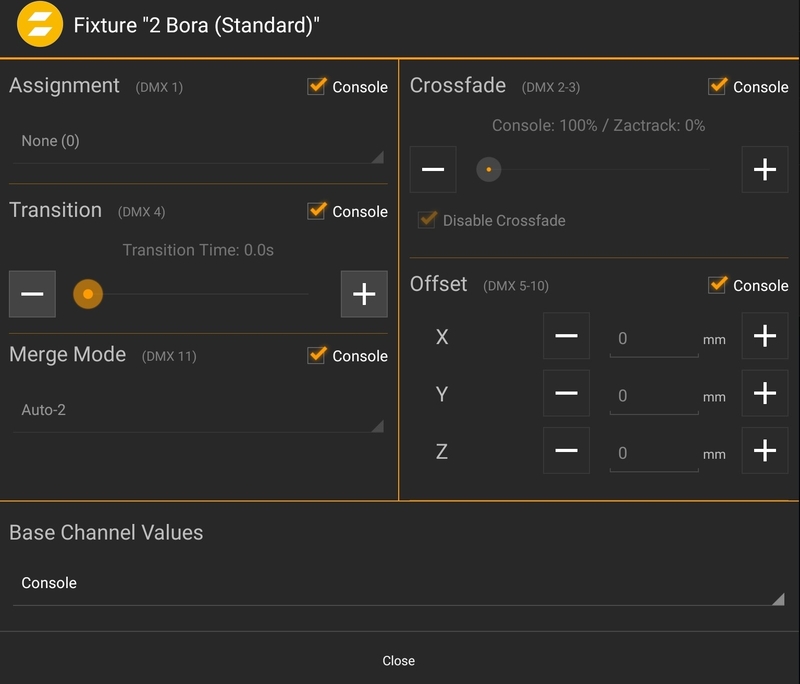 |
Assignment
The assigned tracker will be followed by the fixture. It is also possible to use the XYZ origin or a Fixture freeze position.
Transition
The transition time is used to set the fade time for the assignment.
Merge Mode
Different Merge Modes are available. More information: zactrack fixture
Crossfade
Fade between Console Data and Tracking Data
Offset
In X, Y and Z offsets
Base Channel Values
Can be set to console or highlight.
It is possible to change a lot of settings in the live view.
Tip
The Reset Button in the upper right corner will restore all settings to the default value.
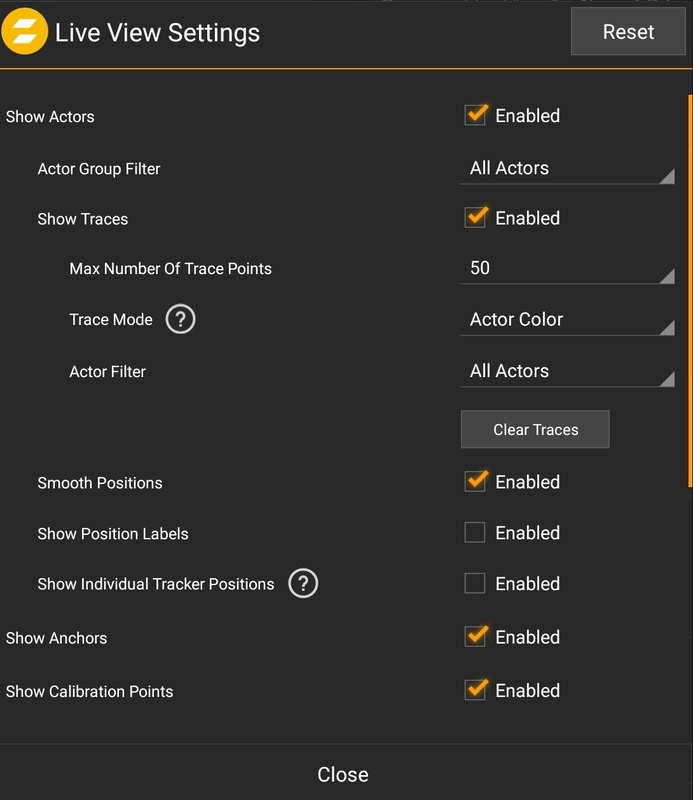 |
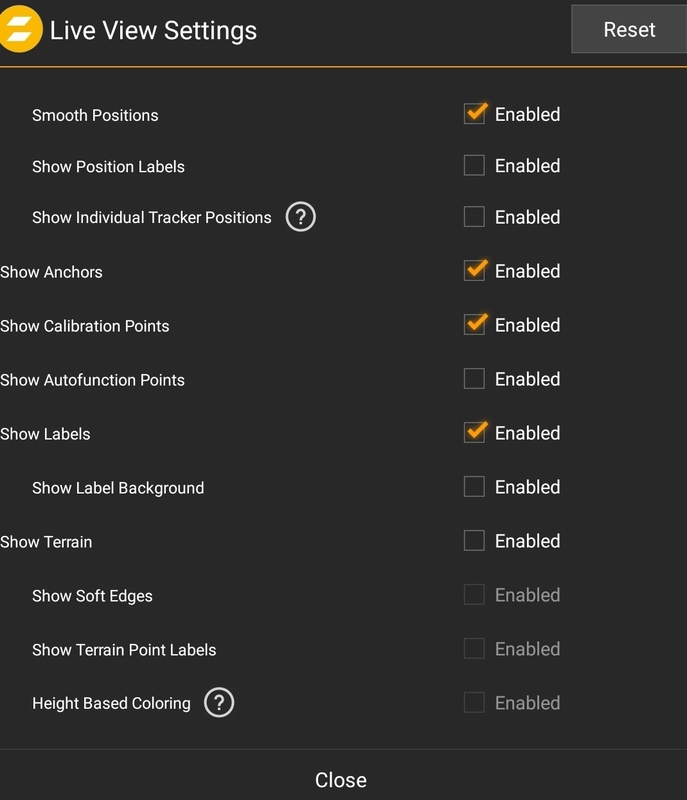 |
Show Actors
Actor Group Filter
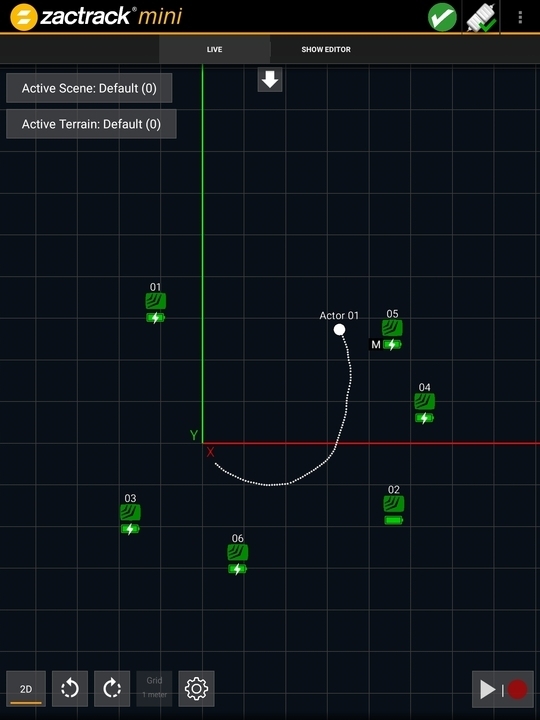
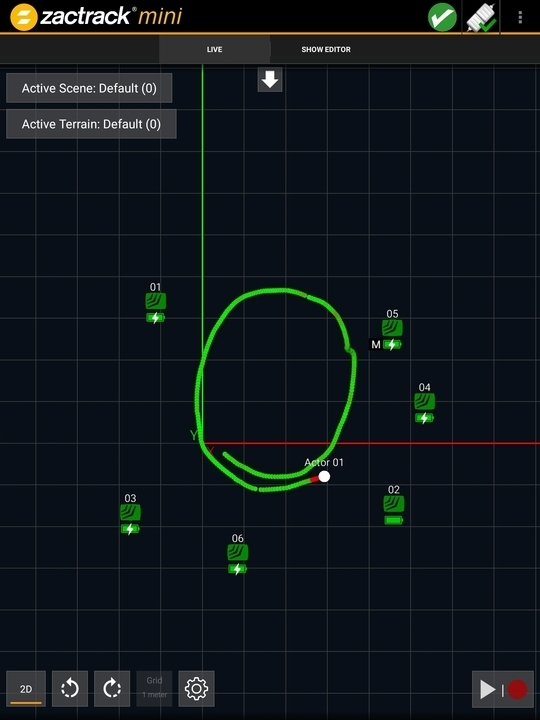
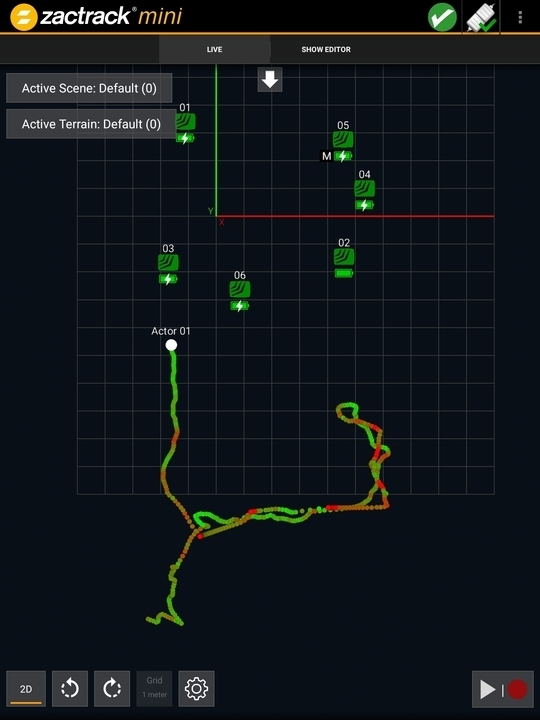
Show Traces
A Trace is a time based course. Depending on how many trace points are active they show more or less of the history of the path. The Actor Filter is only filtering visible Actors. See Traces for more information.
Smooth Positions
It is possible to show the raw position instead.
Show Position Labels
Show coordinate of each single Actor
Show individual Tracker Positions
In case of merged trackers, it is possible to show all individual ones.
Show Anchors
Show Anchors in the Live View.
Show Calibration Points
Show Calibration Points in the Live View.
Show Autofunction Points
Show Autofunction Points in the Live View.
Show Labels
It is possible to hide all labels.
Show Label Background
Colored Background of the label in a frame.
Show Terrain
Activate the Terrain View.
Show Soft Edges
Show Terrain Point Labels
Height Based Coloring
The setup of the Trace Mode is done in the Liev View Settings.
Tip
Special Traces are not availble for PRO Systems.
Note
Traces can help to find bad tracking spots.
Actor Color
This mode just show the time based course of a tracker.
 |
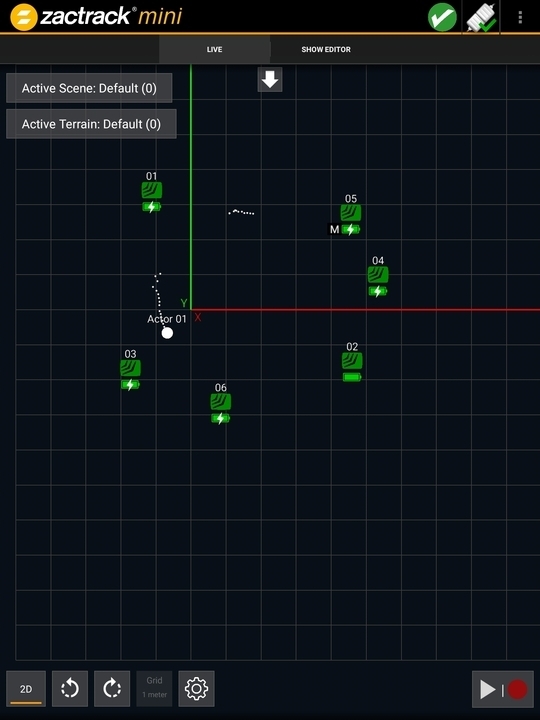 |
The Left picture show a normal colered Trace, in the right picture also colered Trace with a bad connection.
Anchors Used
The first special Trace Mode shows the used Anchors.
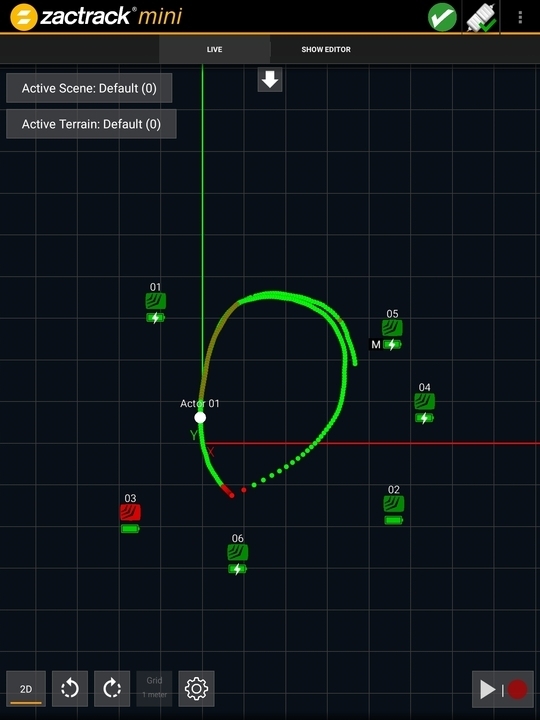 |
 |
The green color shows a good connection to enough anchors. Red shows a connection of to less anchors.
Range-Position Difference
The second special Trace Mode shows the difference between the Range and the position. In order to understand the difference between a range and position see UWB Tracking.
 |
 |
The green color shows a small difference and a good tracking performance. Everthing less then green shows a bigger difference which can cause bad tracking results.