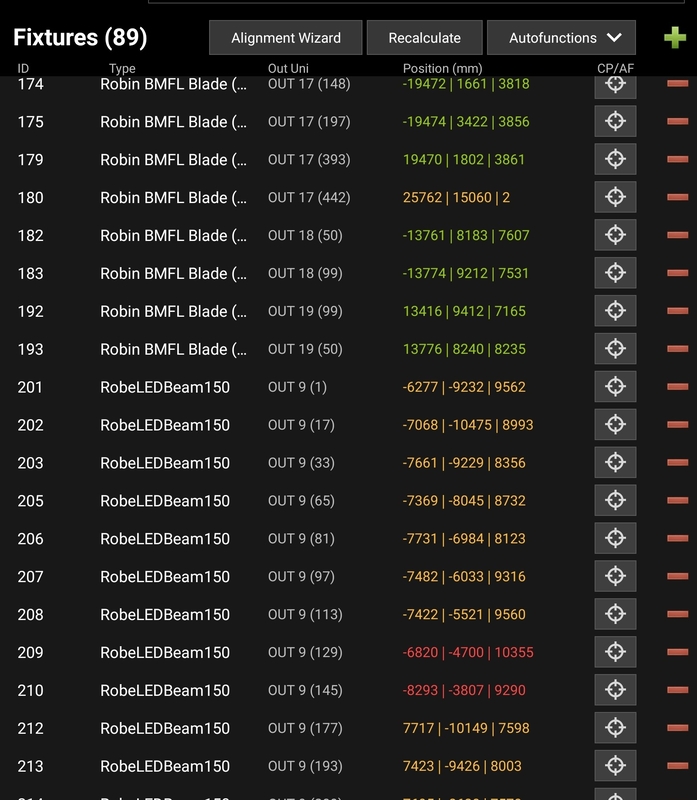
Fixtures
In the Fixture view it is possible to add, remove and align Fixtures.
Tip
Before adding a Fixture, be sure the desired Fixture Type and Universe is created.
 |
Powerful tool to align a Fixture.
Recalculate
Wizard for multiple recalculations of fixture positions. This can be used after changing a Calibration Point for instance.
Import AF
Import Autofunction Points from the Autofunctions App.
Export AF
Export Autofunction Points for the Autofunctions App.
Autofunction Wizard for creating simple Autofunction shapes.
Press the  symbol in the top right corner.
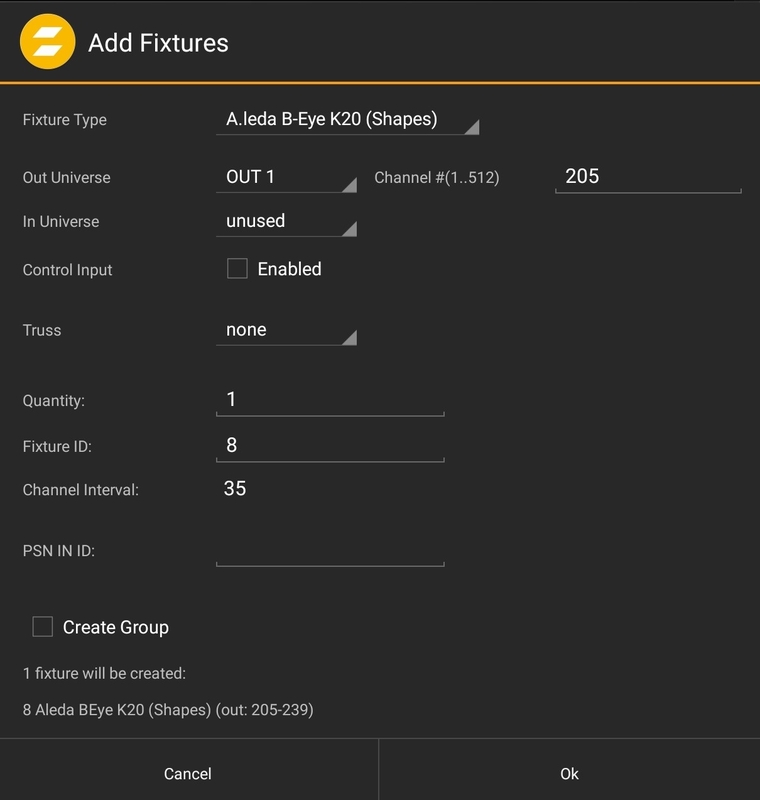 |
Fixture Type
Select the previously added Fixture Types in the Fixture Type Window from a drop down menu.
Out Universe
Outputting Data Universe and channel.
In Universe
To merge data its necessary to put data thru the zactrack system. The In Universe is the universe for the reception of the data.
Control Input
To be able to control the fixture with zactrack it is necessary to add control channels. These channels can be controlled with DMX or OSC. In Case of DMX it possible to select a universe and a channel.
Truss
Old function only to be able to use old show files.
Quantity
The Amount of fixtures that should be patched.
Fixture ID
Custom ID of the Fixture
Channel Interval
Information of channels
Create Group
It is possible to create a group immediately.
To edit a fixture, press the according row. The Edit Fixture window opens.
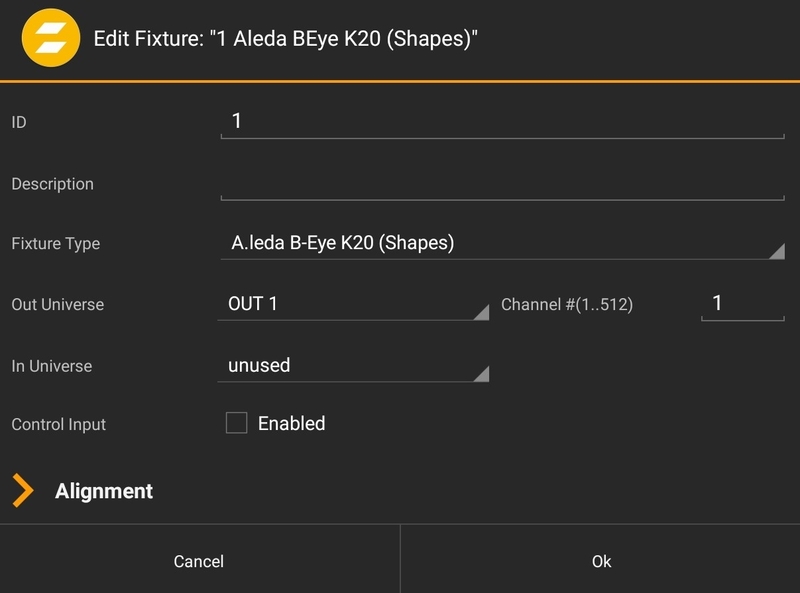 |
It is possible to change settings here. To get more information it is possible to expand the Alignment.
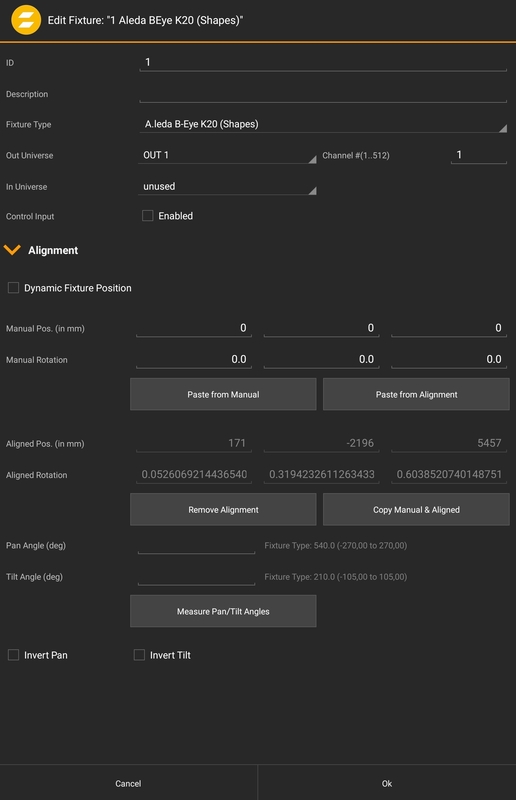 |
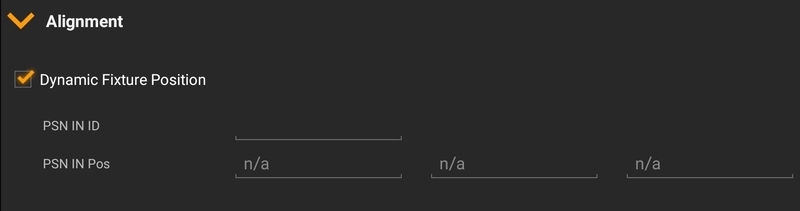
In the expanded window, position and alignment information can be found. It is possible to add a manual position. There is also a checkbox with the Dynamic Fixture Position. Activate it and add a PSN ID if the fixture moves.
Note
If a Dynamic Fixture Position is needed, it is necessary to active it before the Fixture Alignment is done!
 |
There is also a Measure Pan/Tilt Angles button.
The Alignment is the calibration of a fixture position. There are different ways to do this:
Use the Alignment Wizard - see Align for more information
Align manually with Pucks or Calibration Points
To open the manual Alignment press the  symbol in the desired row of the fixture.
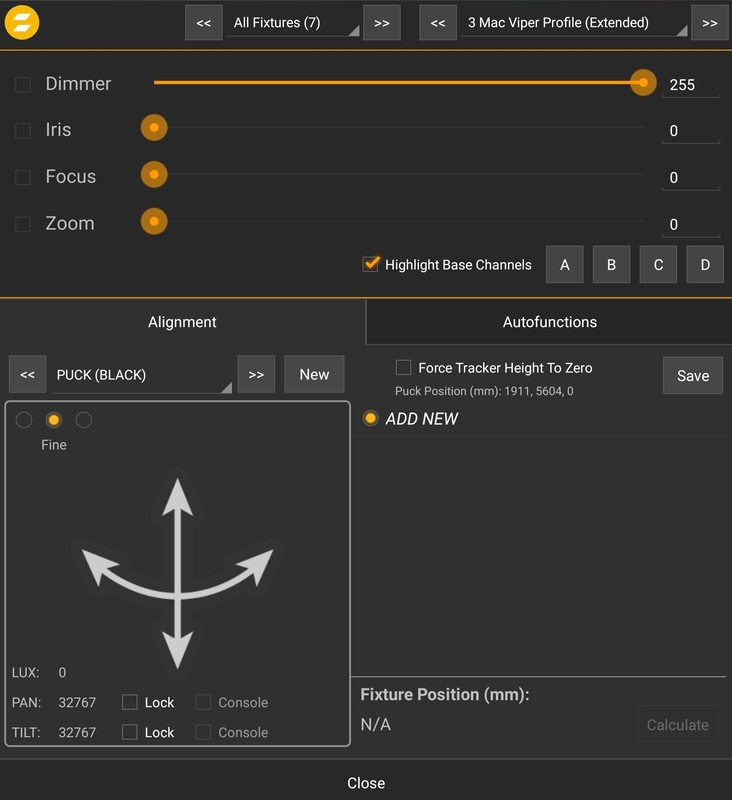 |
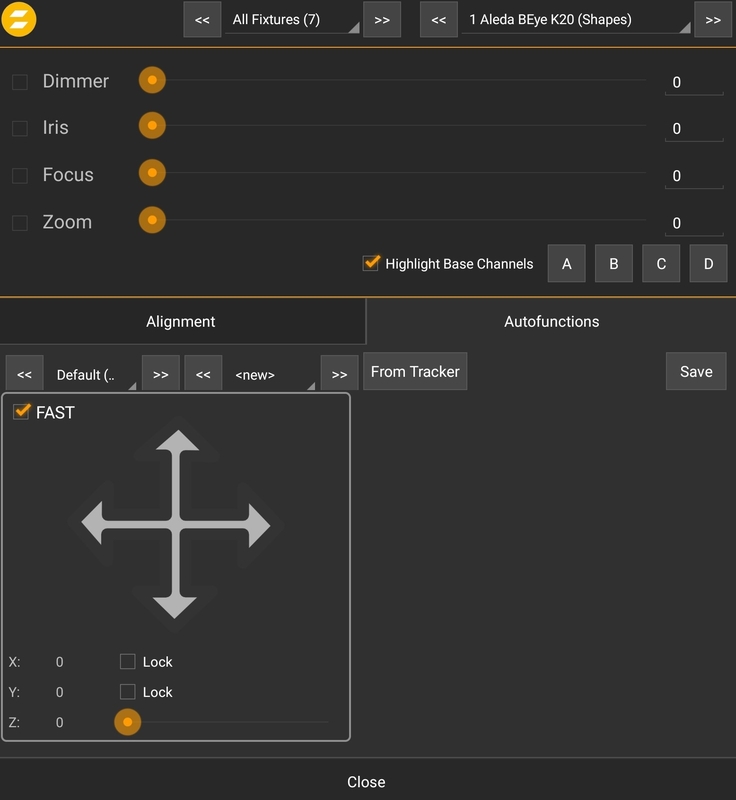
It is possible to change settings of the fixture in the upper section of this window. To get a good alignment, try to use a small beam size.
 |
The point selection can be found in the middle of the screen. A point can be a Puck, a Tracker or a Calibration Point. Puck and Tracker are live information of a position and a Calibration Point is a pre measured fixed point. It is possible to select a point or create a new one.
If the Puck or tracker is used at the ground level (z=0), please use the Force Tracker Height To Zero checkbox to get better results.
Select the fixture
Change the fixture with arrows in the upper right corner
Turn the dimmer on, highlight the base channels and adjust the settings for the beam
Select a point from the drop down menu
Use the touch interface to bring the light beam in the center of the selected point
Save the point
Repeat the procedure, at least 4 points are needed
Click Calculate to get a fixture position
Note
It is also possible to change pan tilt values with the console and store the points. Therefore a correctly set DMX In Universe is necessary. Use the checkbox in the touch area for console data.
T Refinement uses a light sensor to automatically find the center of the light beam. The Refine window opens with a long press in the alignment window.
 |
It is possible to use a Puck or the front camera of a tablet.
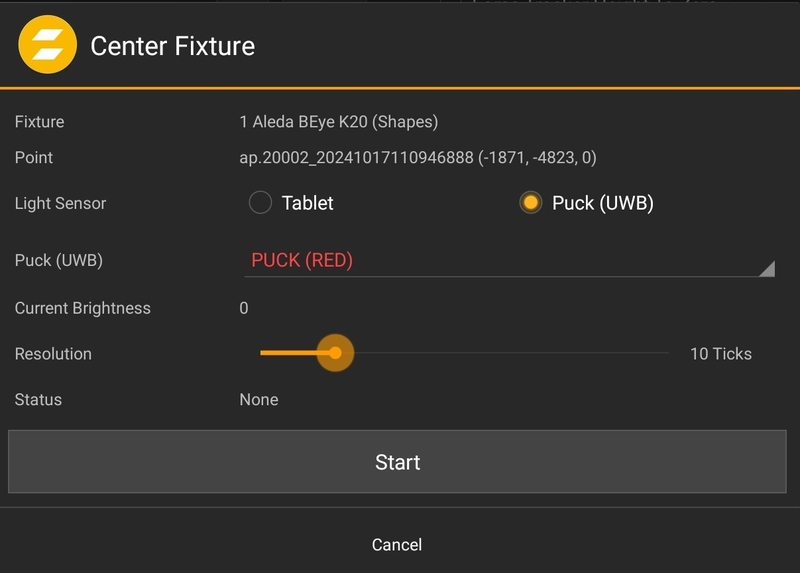 |
Warning
After The Refinement (only one point at the same time) please press Save to update the exact Pan and tilt values!
After updating the pan and tilt values, press Recalculate.
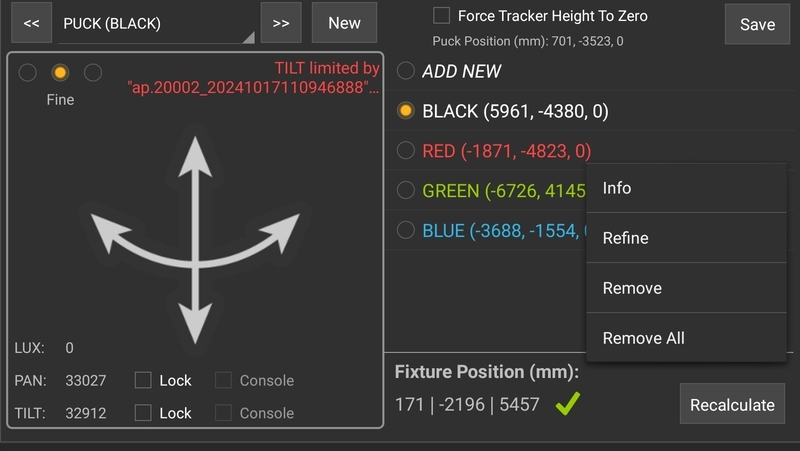
The Fixture window then shows the information of the Alignment.
 |
Green value
Signifies a good Alignment.
Yellow value
This signifies an Alignment that is OK. When using wash lights, often only a yellow result is possible.
Red Value
This is a bad alignment result. Don´t use red alignment data.
Tip
See Troubleshooting for more information.
Next to the Alignment Tab, the Autofunctions Tab can be seen.
After the successful alignment it is possible to check, if the fixture can follow a straight line. In this window it is possible to check the correct alignment, try to lock an axis and check the fixture.
It is also possible to move to an Autofunction point.
 |
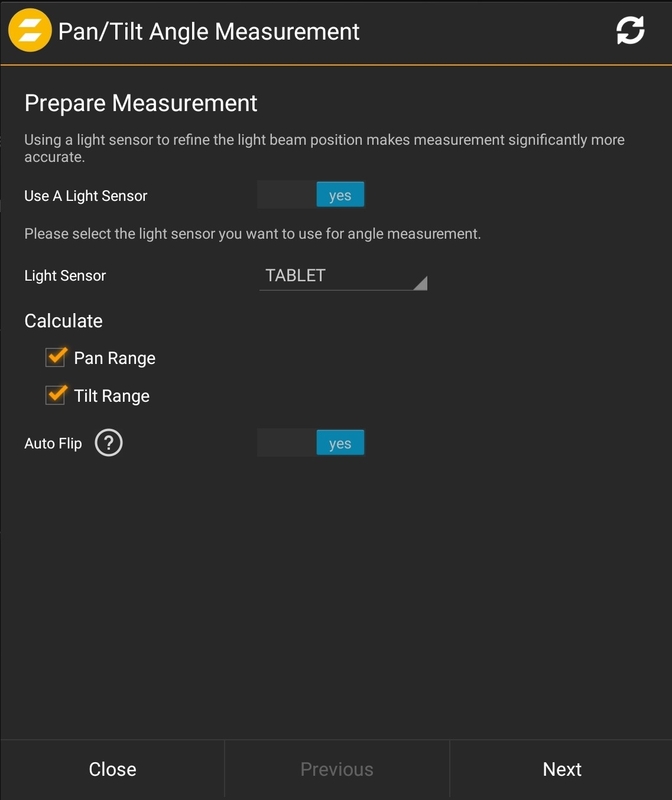
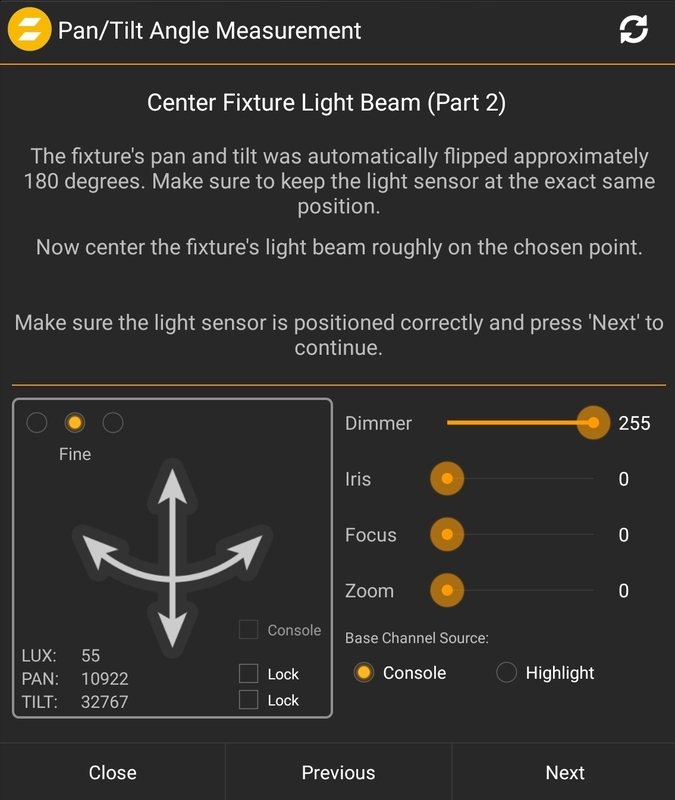
To calculate the fixture position it is necessary to use the correct absolute pan and tilt values of a fixture. Often the values from the manufacturer are not exact enough. Wrong angles will affect the correct alignment.
The Pan/Tilt Measurement is available for a fixture type, it sets the angle to all fixtures based on the profile, it is also possible to do a measurement based on only one fixture. (Bad Maintenance as an example)
The Wizard guides through the process.
 |
 |
 |